Hostwinds Tutorials
Search results for:
Table of Contents
WordPress Application Template Overview
Tags: WordPress
Your Hostwinds WordPress Application Template includes a full setup and installed WordPress installation, using the latest version of WordPress available. It runs on one of our LAMP stack instances.
How Do I Install WordPress on my Instance Using the Application tab?
Step One: Locate and click on your server in Cloud Control
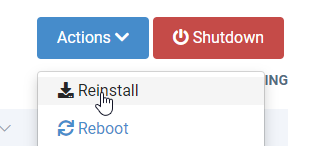
Step Two: Click Actions-> Reinstall

Step Three: On the Application tab, Select WordPress

Step Four: Be sure all important data is backed up off your VPS, and when you're ready to reinstall the OS and install WordPress, click Confirm at the bottom of the list. Your VPS will shut down, terminate (it may disappear from Cloud Control temporarily) then be re-created with the WordPress image.

How Do I Access WordPress?
Once the WordPress image is installed, you'll get a new email with the following details:
- Your server's login information
- Your server's IP Address
- Your server's password
- The WordPress install directory
- The WordPress database name and username
- The WordPress wp-admin login information
WordPress and the LAMP stack will continue to be installed by script after this. If you SSH into the VPS and see a green banner, you may have to wait a few more minutes.
You will get a second email once the installation is finished. The default wp-admin URL will be hwserv-######.hostwindsdns.com/wp-admin, the username will be hstwnd_admin, and the password will be the root password for the server.
We suggest changing your username and password once this has been installed for security reasons.
Brand New WordPress Website
If this is your first WordPress website, there are a few things you need to do to get started:
Step One: Point your domain's A record to your server (using the dedicated IP provided in your welcome email) using Cloud DNS. Once your "A" record or nameserver is edited, propagation will begin. Propagation can take up to 24-48 hours to complete, and further review can be read here.
Step Two: In the meantime, you can log into your WordPress Admin panel using the http://hwsrv-######.hostwindsdns.com/wp-admin link provided.
Step Three: Once the DNS change for your domain has propagated, you can change the URLs for the site in WP-admin:
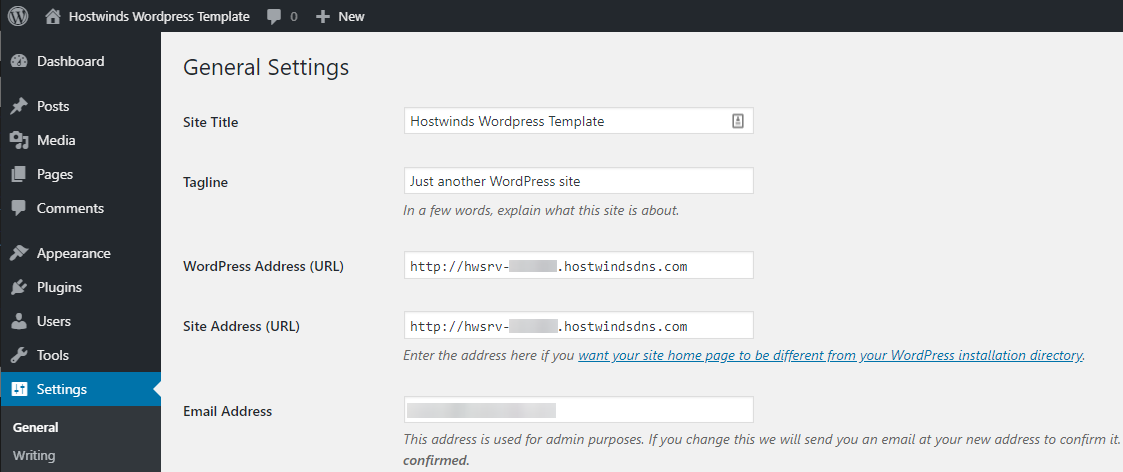
Log in to wp-admin and click the Settings tab:

Change the WordPress Address (URL) and Site Address (URL) to the domain now pointing to your Cloud VPS.
Reload your wp-admin on the new domain and enjoy building your site!
Debugging the WordPress install
After changing the domain, I can't get into WordPress anymore
If the DNS hasn't properly propagated or you're having issues with DNS, you may need to switch back to a domain name that you always know works.
The WordPress image on our Cloud Control includes phpMyAdmin for editing the database(s) in your WordPress. Navigate to it at
http://hwsrv-######.hostwindsdns.com/phpmyadmin/ and log in with the username 'root' and the password in your root home directory under /root/.my.cnf

The contents of /root/.my.cnf
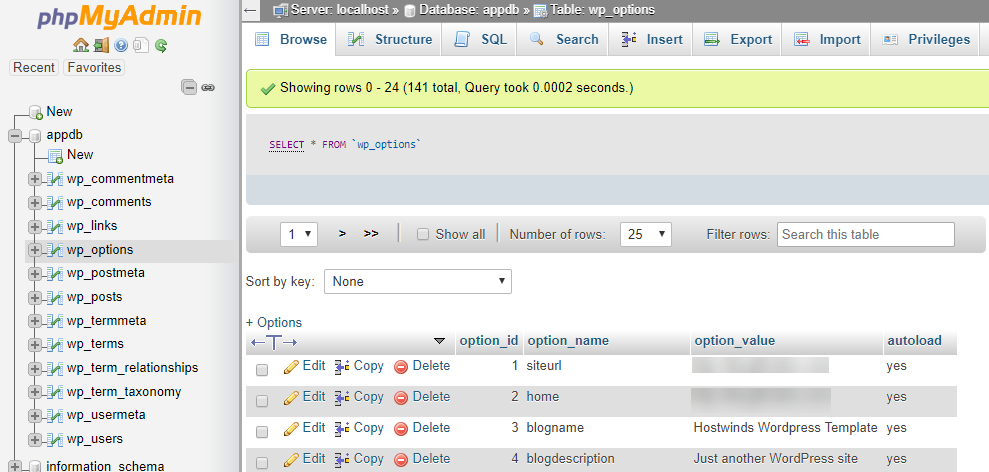
Once logged into phpMyAdmin, click the + next to the 'app's database, and click on the wp_options table.

For both the 'siteurl' and 'home' options, click the Edit button and change it back to the http://hwsrv-######.hostwindsdns.com domain name, then click go. After this, you should be able to load up http://hwsrv-######.hostwindsdns.com/wp-admin and modify the site again.
Existing WordPress Website
If you already have an existing WordPress website and you want to migrate your website to Hostwinds, you may submit a support ticket requesting the transfer of your service is Fully Managed.
Written by Michael Brower / September 28, 2017
