Hostwinds Tutorials
Search results for:
Table of Contents
Which nameservers should I use for my domain?
Tags: Nameservers
Any Hostwinds clients who have a domain registered with us have a few different options for using nameservers for their domain. In addition, we offer DND Management for any domain through your Cloud Portal and directly in cPanel for your Shared or Business Web hosting account. Each of these solutions offers you an easy way to set up a domain and get your website accessible on the web for anyone to view.
What are "Name Servers"?
Name servers, also known as "DNS" servers, are special computers on the internet that act as bridges between humans and computers. Their job is to take a web address, like www.hostwinds.com, and translate it into something a computer can look up, like an IP Address. Consequently, all domains need name servers set up properly for your website to be available on the internet and for an email to be routed to your INBOX.
What nameservers do Hostwinds offer?
Hostwinds offers:
- Shared Nameservers
- Cloud Nameservers
Which ones should I use?
- Clients using shared or business hosting can take advantage of using cPanel to manage and configure their DNS for them automatically.
- Any Hostwinds customer has access to our cloud DNS servers and may set up their domains in the cloud portal.
Where can I find my nameservers?
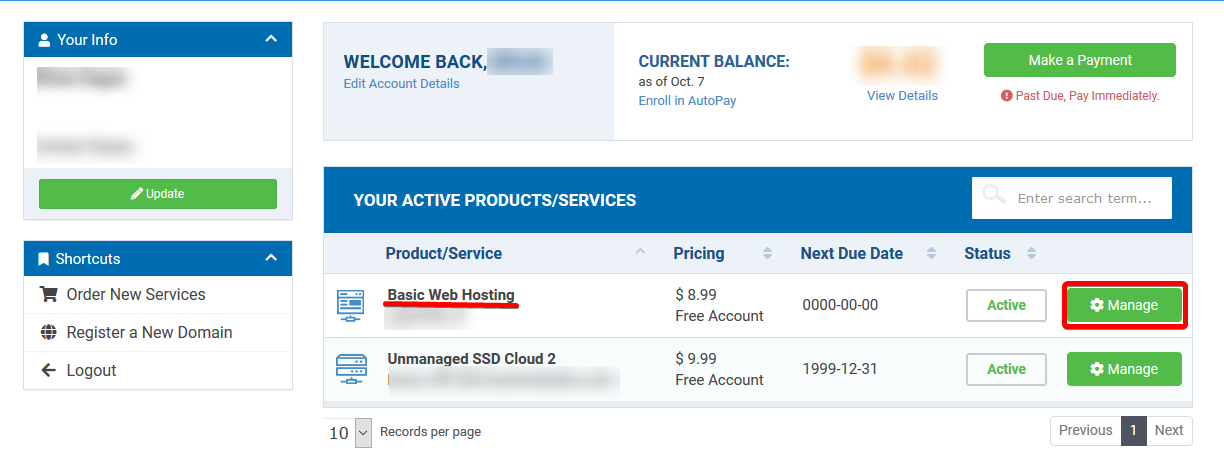
Shared customers can find their nameservers by logging into Hostwinds and clicking the "Manage" button next to a Basic, Advanced, or Ultimate plan:
On the Manage Page, you can view your nameservers:
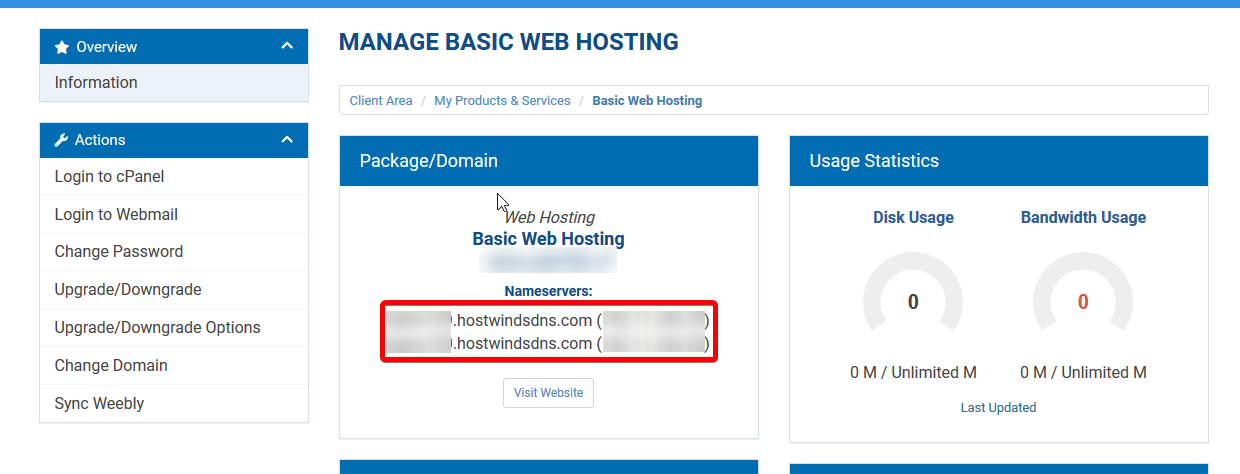
Depending on your server's location, these nameservers may start with seans, dalns, or amsns.
Using Hostwinds Cloud DNS Manager
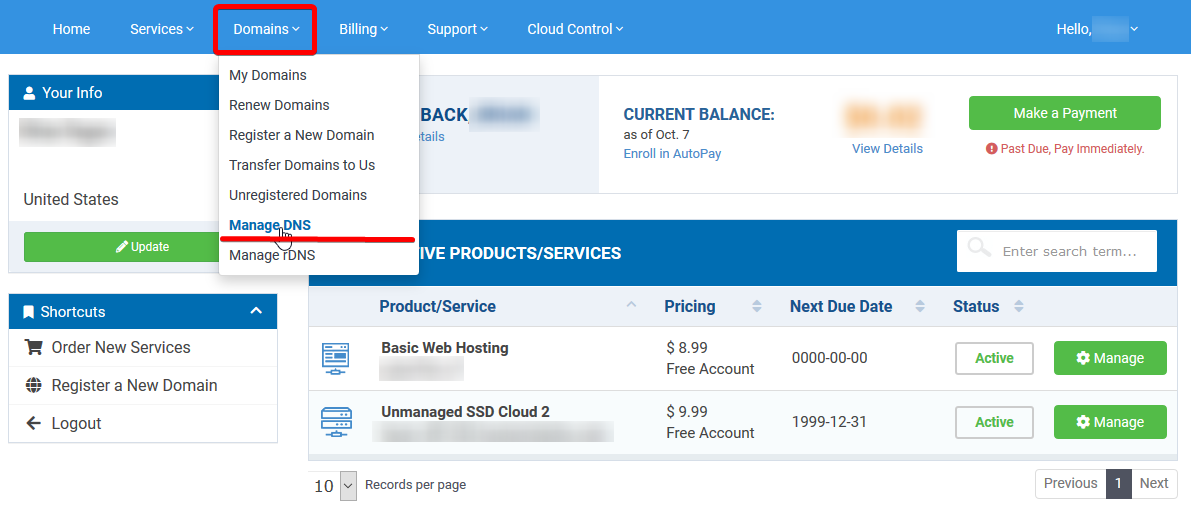
From the client area, select domains, then from the drop-down menu, select "Manage DNS"
That will take you to a page where you may add a new domain:
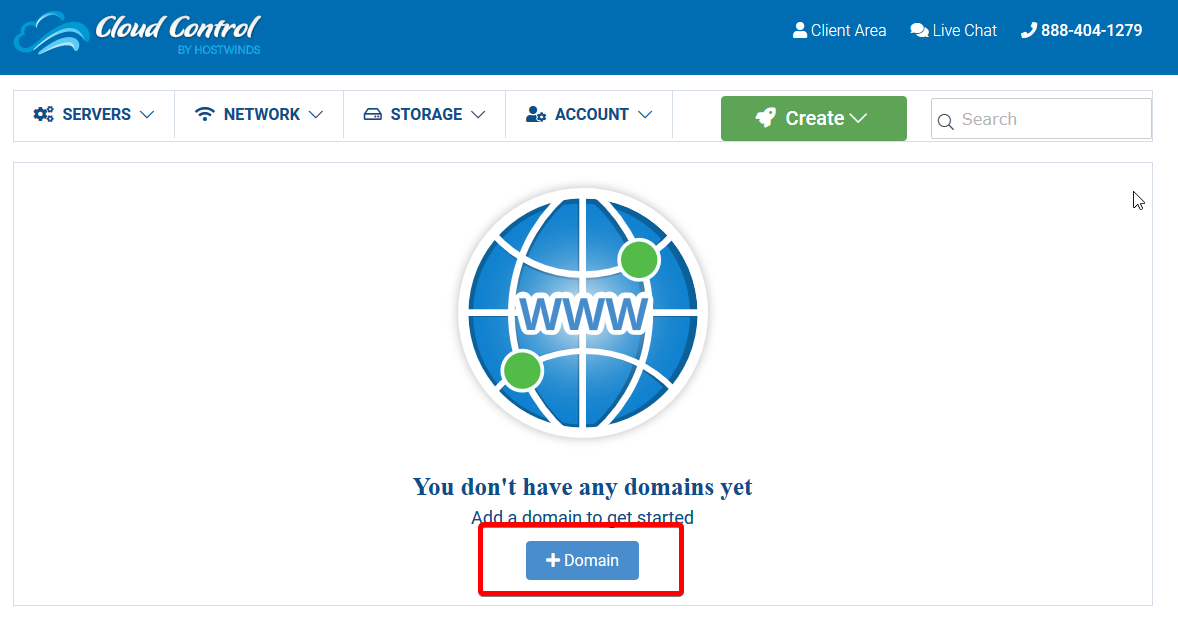
Now, add your domain to the system.
You'll need to add the nameservers listed to your DNS at your registrar. These nameservers should be displayed on the screen and should start with mdns. For example, if you registered with Hostwinds, click the "Client Area" at the top of your Cloud Portal and head back to the Client Area.
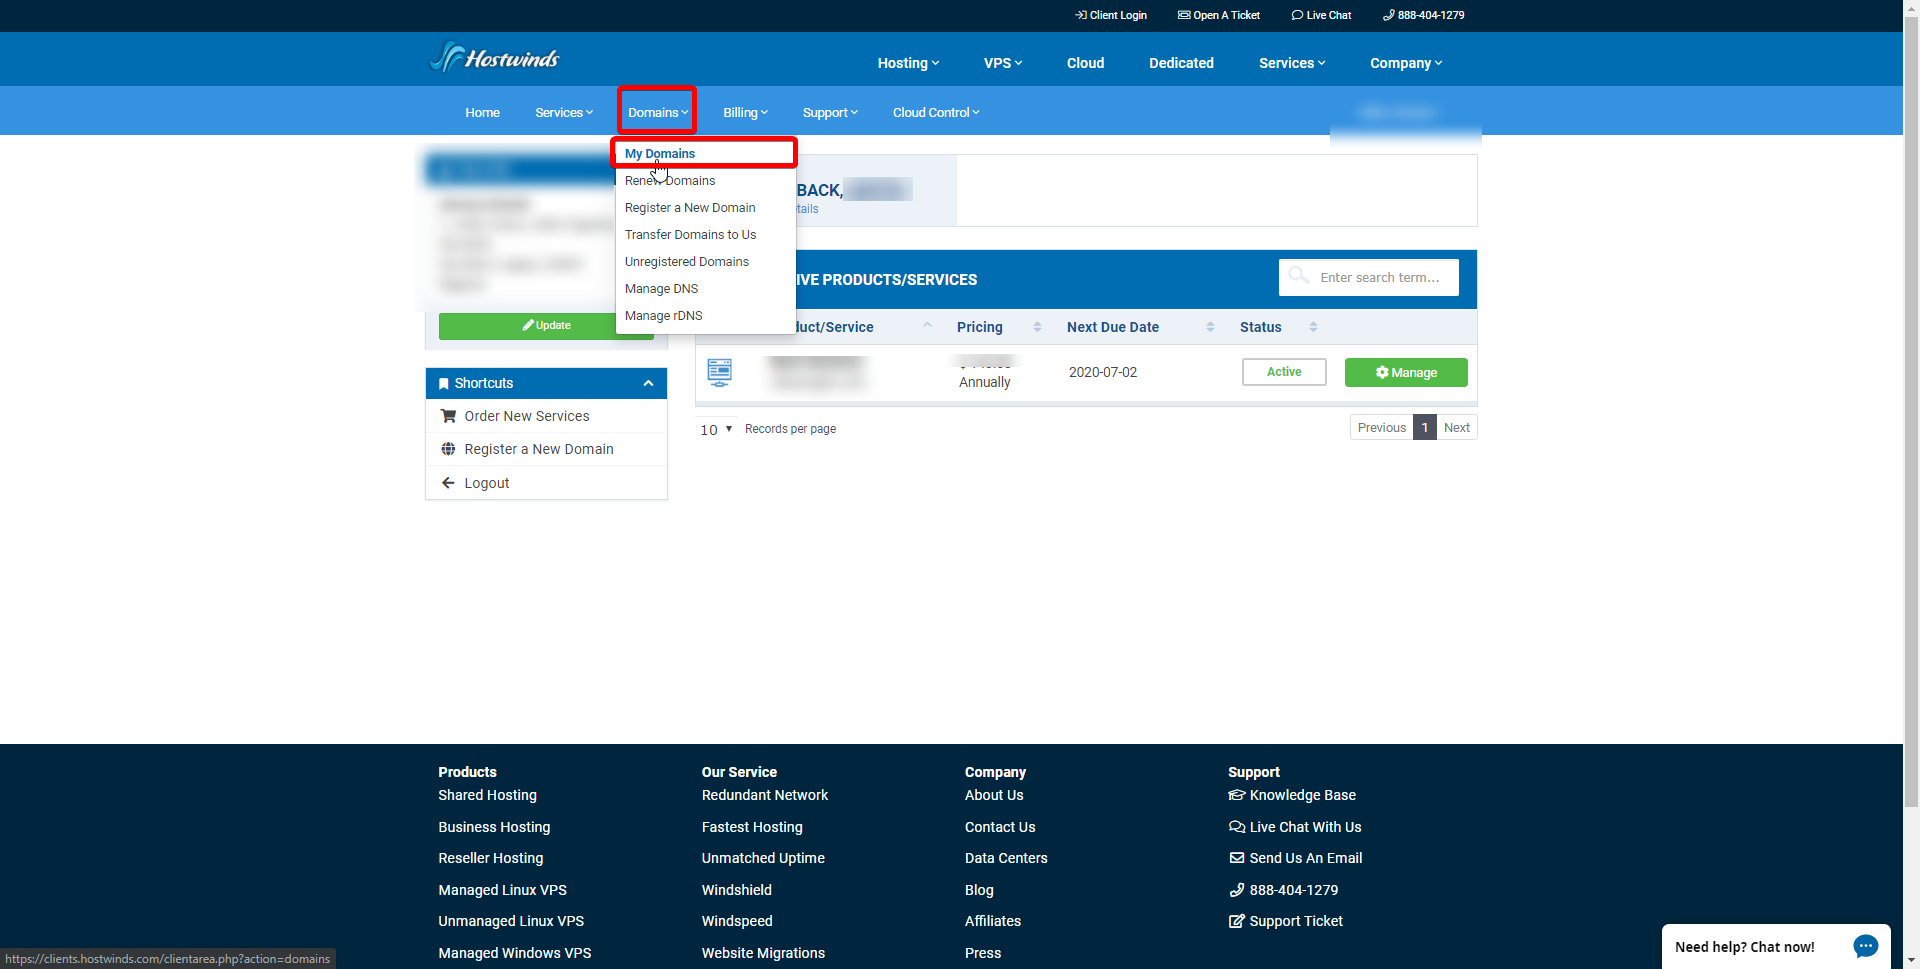
Once there, click on the domains drop-down menu, and select "My Domains".
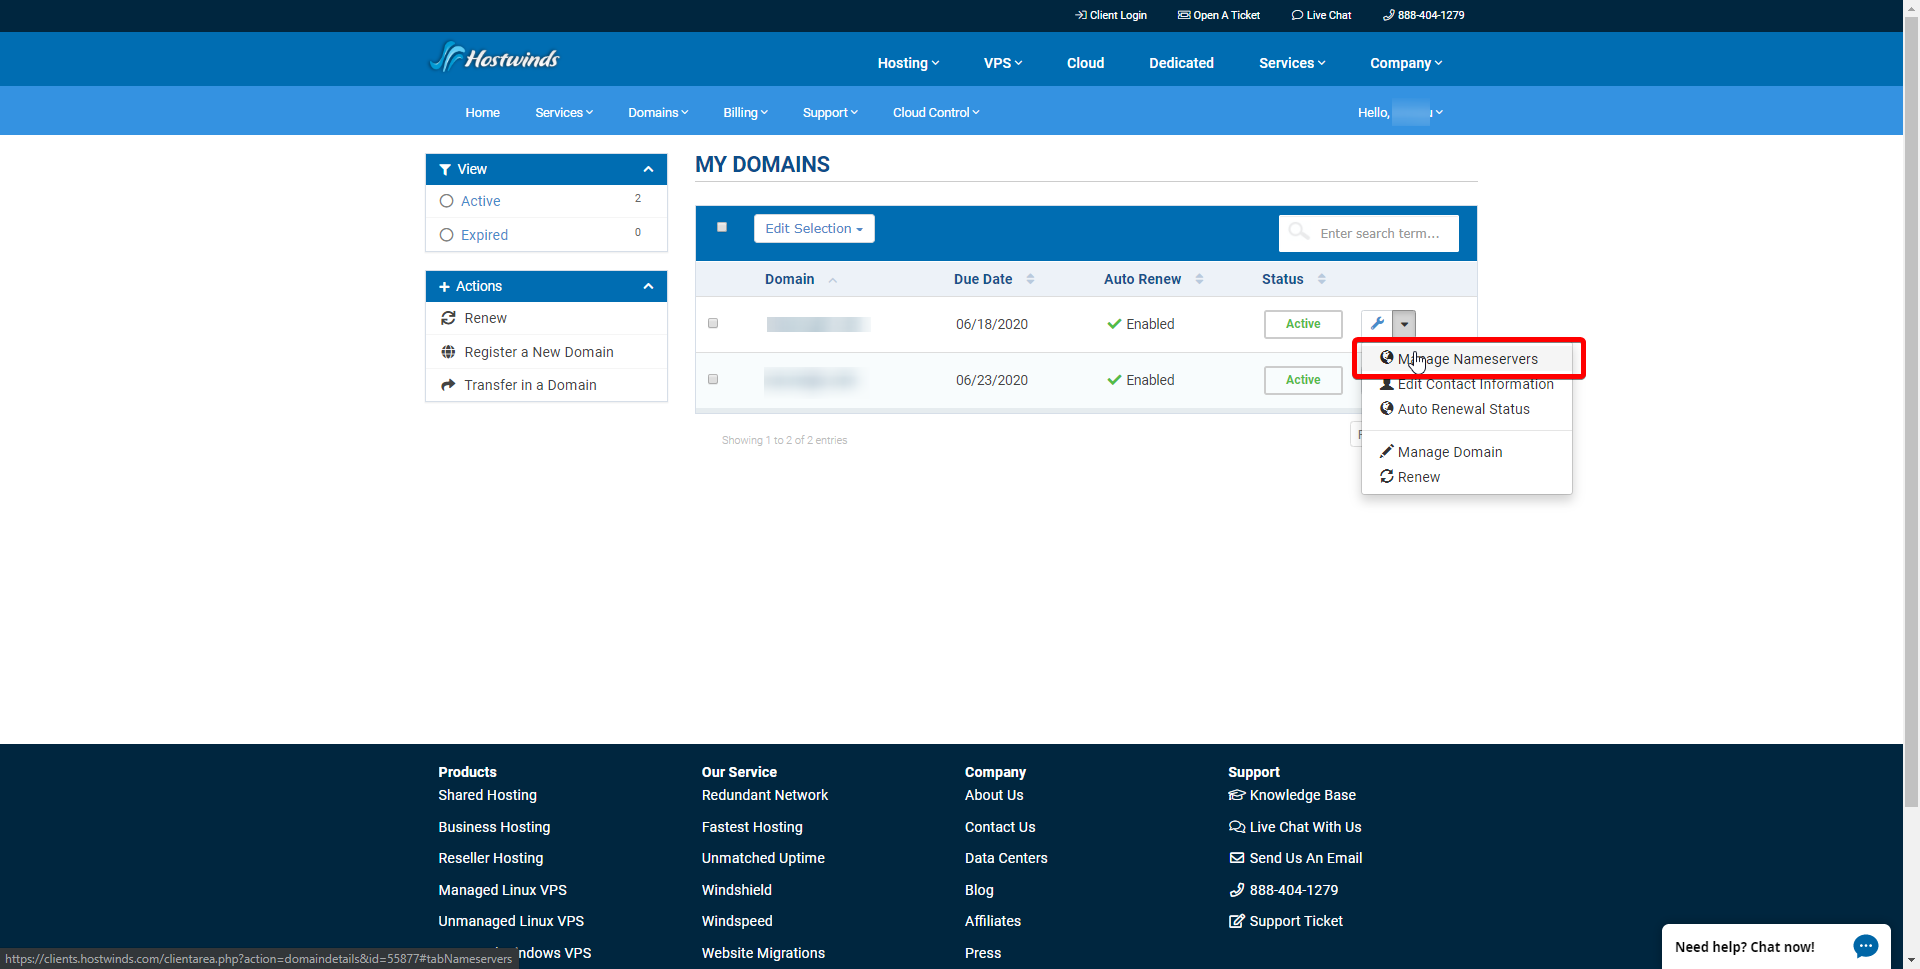
Under your domains, click the arrow on the right and select "Manage Nameservers" from the drop-down menu.
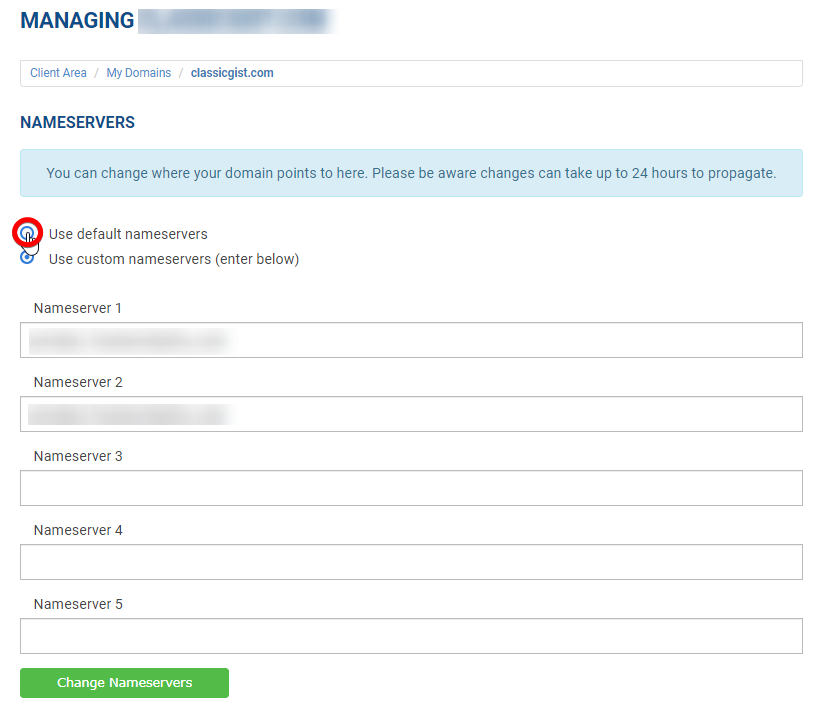
Now, click the "Use Default Nameservers" Radio button. Alternatively, you can set the nameservers under the "Nameserver" text.
Once you've added the nameservers, click the Domains menu, and then click "Manage DNS" to return to the cloud DNS portal. Once there, click on the Actions drop-down menu, then click "Check".

It may take a few minutes, but once you see the Message "Check DNS succeeded", you will be able to set up your DNS records.

Under the "Actions" drop-down menu, click "Add records". On the next page, you'll be able to add new records for your DNS.

Written by Hostwinds Team / June 5, 2021
