Hostwinds Tutorials
Search results for:
Table of Contents
Troubleshooting Remote (RDP) Connection With Windows VPS
Remote Desktop (RDP) can occasionally have errors when connecting. Before troubleshooting, please review How to Connect to Your Server From a Windows OS via RDP and ensure your login details are correct. If you are still getting an error connecting to your Windows VPS with Hostwinds, and the issue is not password-related, please follow these steps in an attempt to repair the network connection.
Repair The Network From Your Cloud Portal
Hostwinds provides the ability to repair the network connection from your Cloud Portal.
Step 1: Log into your Hostwinds Account
Step 2: Navigate to the Cloud Control drop-down and select Cloud Portal

Step 3: Select the instance you wish to repair.
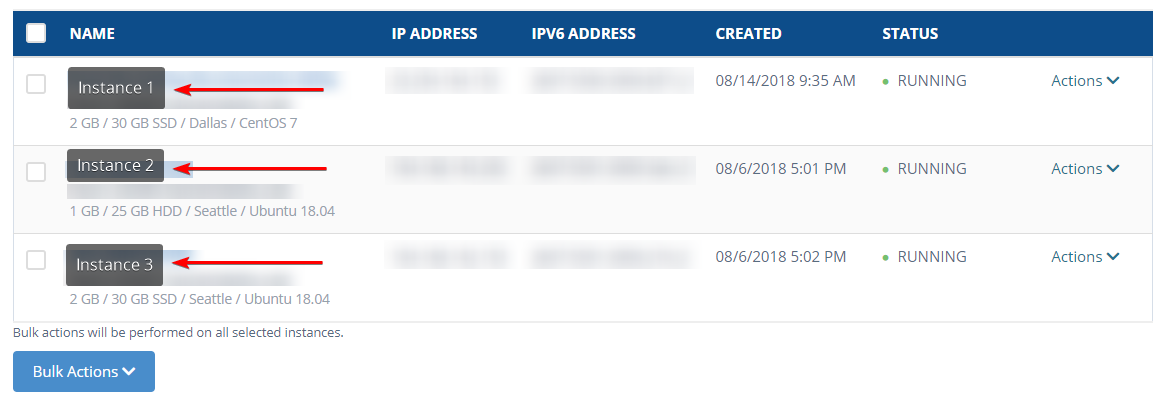
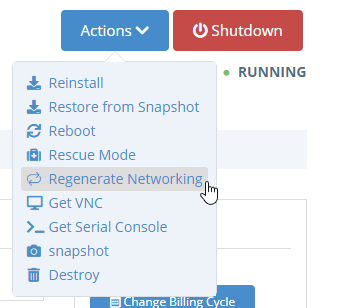
Step 4: Select the Actions drop-down and choose the Regenerate Network Option.
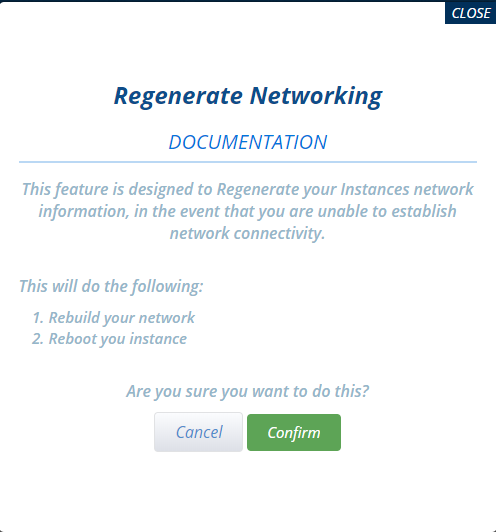
Step 5: A confirmation screen will appear, explaining what is about to happen. Click confirm when ready.
Your instance will now try to resolve the current connection problem, and you may notice your instance page refreshing with connection information like "build network running." Provide the instance 5-10 minutes to attempt the repair, and once done, perform a reboot under the same Action drop-down. Now try and see if you can RDP.
Repair Via VNC Connection
Hostwinds allows access to your VPS via a VNC connection (Virtual Network Computing) within your Cloud Instance portal. This connection is great for troubleshooting, and VNC is an independent connection straight to your server for this very reason. Following these steps may be used to repair your RDP connection and/or internet browser connection.
Step 1: Log into your Hostwinds Account
Step 2: Navigate to the Cloud Control drop-down and select Cloud Portal

Step 3: Select the instance you wish to repair.

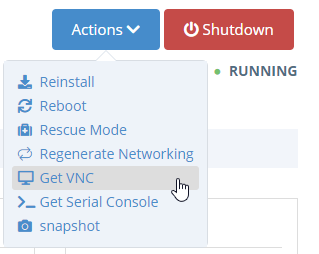
Step 4: Select the Actions drop-down and choose Get VNC, followed by a click "here" to launch. This option will load similar to an RDP connection.
Step 5: The VNC connection should load similar to an RDP connection. If you need CTRL + ALT + DEL to refresh the current page, this is provided within the upper-right-hand corner.
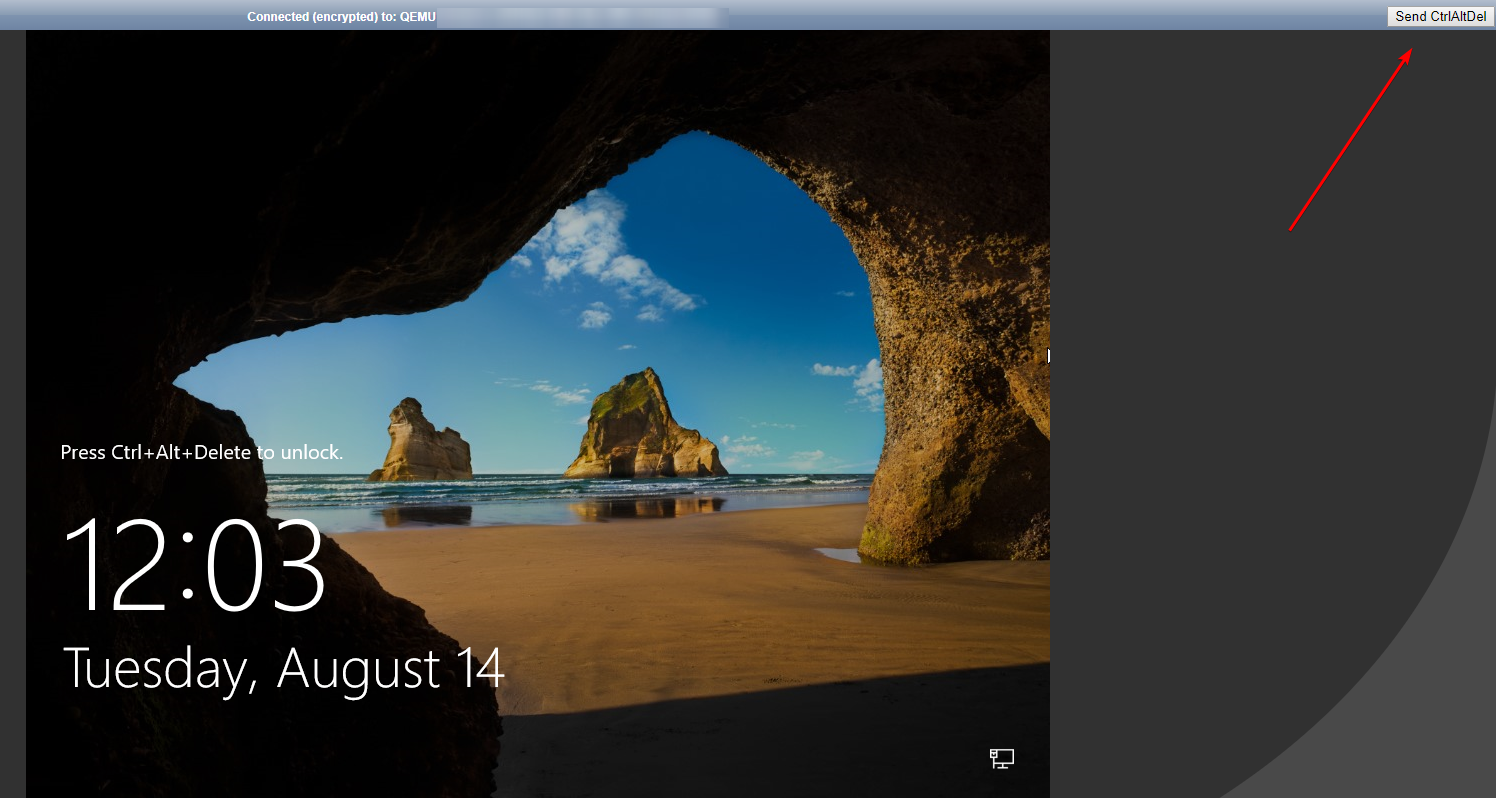
Step 6: Log into the VNC with your username and password for your server. The information was provided in your Hostwinds Welcome Email upon your purchase.
Copy and Paste do not work when copying from outside the terminal and attempting to paste within VNC. You will have to enter your information manually.
Step 7: Locate your Control Panel within your instance, and select Network and Internet.
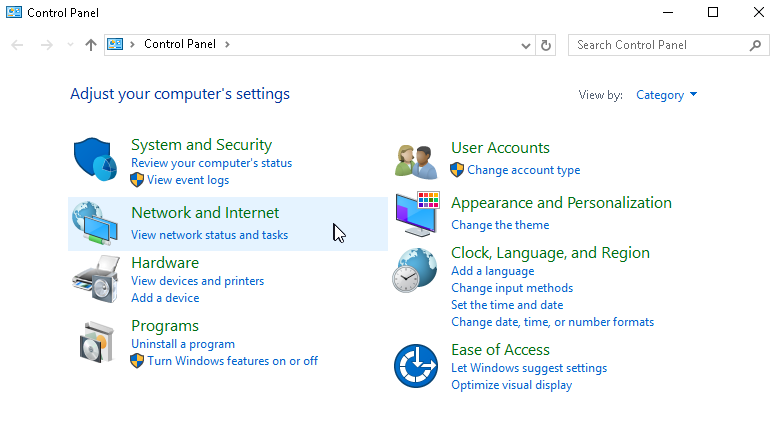
Step 8: Select Network and Sharing

Step 9: Select Change Adapter Settings
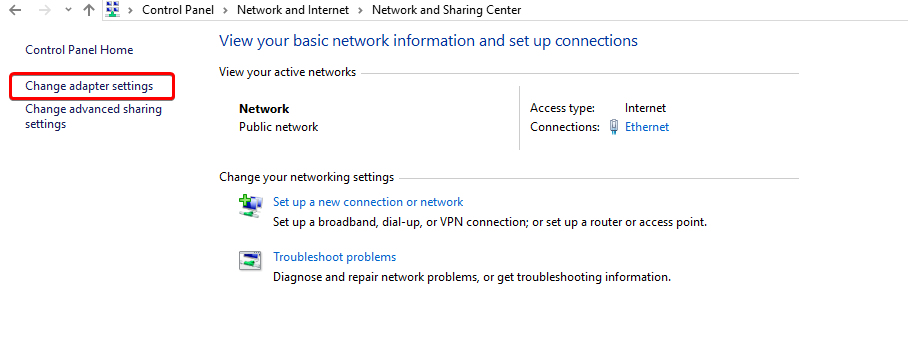
Step 10: Right-hand click on the Ethernet connection and select properties
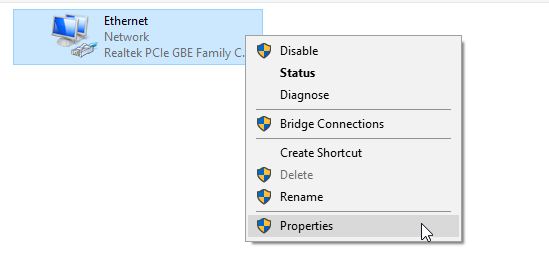
If you notice two ethernet connections here, right-hand click on the second and "disable." This may resolve your current situation. If there is not more than 1, or disabling the second did not resolve your current connection, continue to Step 11.
Step 11: Find "Internet Protocol Version 4 (TCP/IPv4)" and double-click or select Properties.
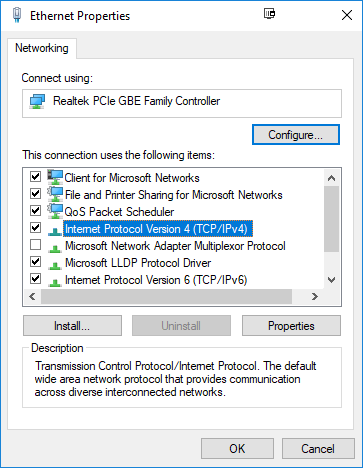
Step 12: This is where the connection problem can be. Please review the current settings and make sure they are as follows in the below-provided image.
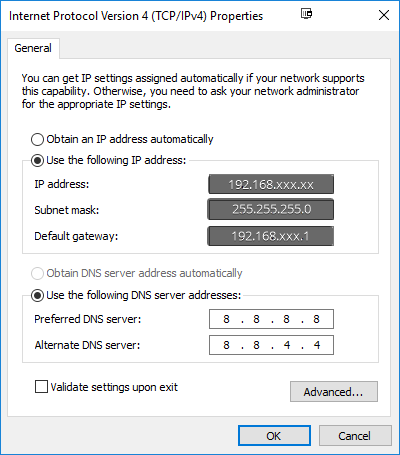
- IP Address – This needs to be your dedicated IP provided to you in your welcome email. It also the one you connect with when attempting to RDP.
- Subnet Mask – This needs to be set to 255.255.255.0
- Default Gateway – This needs to be your dedicated IP provided to you in your welcome email, but ending in 1. (Example If your dedicated IP is 192.168.104.32, your Default Gateway would be 192.168.104.1)
- Preferred DNS server – 8.8.8.8 which is a Googles Public DNS server
- Alternate DNS server – 8.8.4.4, which is Googles Alternate Public DNS server
When done, click ok. It is wise to double-click on "Internet Protocol Version 4 (TCP/IPv4)" to confirm your adjustments stayed. You should also see your network connection. If this was a problem, provide a connection again. Log out now of VNC and attempt to RDP.
Nothing Is Repairing My RDP Connection
If the above steps did not help, please Open A Support Ticket directed to technical support for further assistance.
Written by Hostwinds Team / August 15, 2018
