Hostwinds Tutorials
Search results for:
Table of Contents
Install Cacti On Your Server (Ubuntu 18.04)
Tags: Ubuntu
Monitoring your server is a critical step to managing your server and ensuring that you have accurate data to watch the health of your server. You can review our Open Source Monitoring Services to view the many free options available. This guide will focus on showing you how to install Cacti on your server. Furthermore, it will show you how to access the web portal and start the configuration to monitor the health of your server.
Getting Started to Install Cacti
As with any installation, it is always best to be sure that you have properly updated your server and all default packages. With a Sudo User, you would want to run updates as shown below.
sudo apt-get update
sudo apt-get upgrade -y
By default, PHP will not be installed, but we will require it. These are the packages we will need to install. Use the following installation command:
sudo apt-get -y install php libapache2-mod-php php-common php-curl php-gd php-gettext php-gmp php-imap php-intl php-json php-mbstring php-memcache php-mysql php-pear php-pspell php-recode php-snmp php-net-socket php-tidy php-xml php-xmlrpc
Configure Apache
We will need the server to record time to know what resources were being used at a given time. To set the timezone for your PHP to use, you would go to the /etc/php/7.2/apache2/php.ini and set the date.timezone to your closest region.
sudo nano /etc/php/7.2/apache2/php.ini
date.timezone = "America/Los_Angeles"
Next, we will want to configure Apache to use basic security by allowing Prod Server Tokens. This will be done from the /etc/apache2/conf-enabled/security.conf file. Update line 25, from ServerTokens OS to ServerTokens Prod
sudo nano /etc/apache2/conf-enabled/security.conf
###
In security.conf change line 25 for ServerTokens, change OS to Prod ###
###
ServerTokens Prod
Next, we will want to set up the admin contact, as well as our server name. In /etc/apache2/apache2.conf, add ServerName and ServerAdmin to the bottom of the file.
sudo nano /etc/apache2/apache2.conf
###
Add ServerName and ServerAdmin to the bottom of the file.
Fill in with your servers hostname and an email address
###
ServerName cacti.hostname.tld
ServerAdmin admin@hostname.tld
You will also want to be sure to allow for HTTP and https to ensure that your firewall will allow access. Then restart the Apache Web Server.
sudo ufw allow http
sudo ufw allow https
sudo systemctl restart apache2
Install MariaDB
Next, we will need to install MariaDB onto the server for Cacti to use. You can run the installation through the apt-get installer.
sudo apt-get -y install mariadb-server mariadb-client
You will now need to run the MySQL secure install. Here you will want to set the root password. Be sure to set it to something secure. You will want to remove anonymous users and disallow root login remotely. This way, the server is only accessed by users you make, as well by restricting the root user to only log in directly from the server. Remove the test databases and users, as they will not be needed. Then reload the privileges table to solidify these changes.
sudo mysql_secure_installation
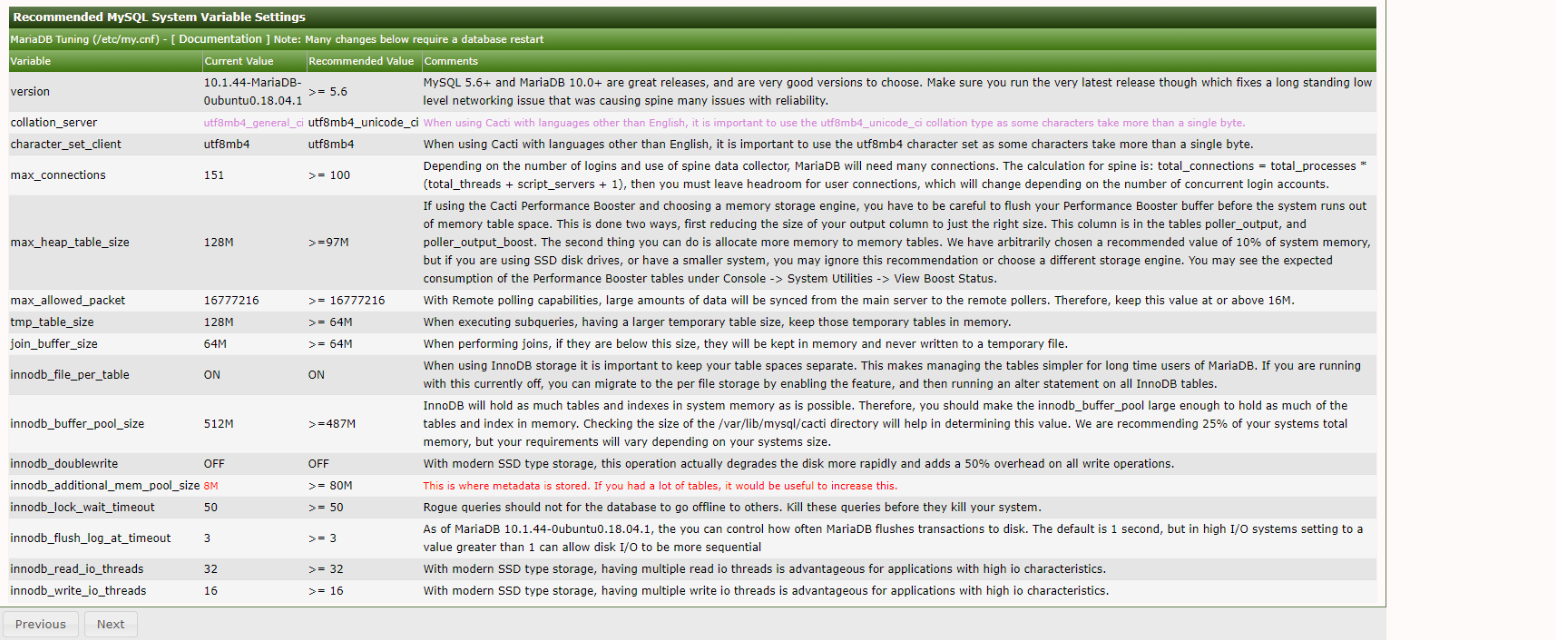
Next, we will configure the MariaDB config to better suit what we will need for Cacti. We will want to open up the /etc/mysql/mariadb.cnf file as a sudo user and add the following at the bottom of the page. If a [mysqld] already exists, then you can add it below.
sudo nano /etc/mysql/mariadb.cnf
# Add tot he bottom of the file under [mysqld]
max_heap_table_size=128M
tmp_table_size=128M
join_buffer_size=64M
innodb_buffer_pool_size=512M
innodb_doublewrite=OFF
innodb_flush_log_at_timeout=3
innodb_read_io_threads=32
innodb_write_io_threads=16
Then restart MariaDB:
sudo systemctl restart mysql
Now that we have MariaDB configured for Cacti, we can create our Cacti Database and user. We will need to log in as the root user to make these.
sudo mysql -u root -p
Once you are logged into the MariaDB, you will want to run the following lines to create the Cacti user and database.
> create database cacti;
> grant all privileges on cacti.* to cacti_user@'localhost' identified by 'strongpassword';
> flush privileges;
> exit
Install Cacti and SNMP
Now that our database is ready to support our installation, we can install Cacti and the Simple Network Management Protocol (SNMP) packages we will need.
sudo apt-get -y install snmp snmpd snmp-mibs-downloader rrdtool cacti cacti-spine
Cacti will ask which web server you are using for Cacti. We are using apache. We will choose No for the dbconfig-common option.
Configure SNMP
Firstly, we are going to configure SNMP. We will start by disabling the MIBs. We will disable it by commenting out the line in the /etc/snmp/snmp.conf
# mibs :
Next, we will edit /etc/snmp/snmpd.conf (a different file), and we will be editing the rocommunity for the localhost. You can give it any name that you would like. If you want, you can also disable public access to Cacti as well.
#Set SNMP community name
 rocommunity CactiTest  localhost

#Disable Public Access
#rocommunity public  default    -V systemonly

#rocommunity6 public  default   -V systemonly
Now that we have reconfigured SNMP, we will need to restart the service:
sudo systemctl restart snmpd
Configure Cacti Server
Next, we will need to configure Cacti to the environment that we have set for it. Firstly, to set up this configuration, we will first edit the /usr/share/cacti/site/include/config.php and edit the database connection information.
$database_type = "mysql";
$database_default = "cacti";
$database_hostname = "localhost";
$database_username = ""; # Enter your database user
$database_password = ""; # Enter your database password
$database_port = "3306";
$database_ssl = false;
You can also configure a remote user to access the database from here by editing the second section with rdatabase with the remote user you would like to connect to the server. Next, we will configure the default cacti.sql to our Cacti Database.
sudo mysql -u cacti_user -p cacti < /usr/share/doc/cacti/cacti.sql
We will also need to set the time zone for the cacti database user.
mysql_tzinfo_to_sql /usr/share/zoneinfo | mysql -u root -p mysql
And then grant permissions to our cacti_user that was created. Then flush privileges to reload the new privileges.
mysql -u root -p

> GRANT SELECT ON mysql.time_zone_name TO cacti_user@localhost;

> flush privileges;

> exit
Install Cacti via the Web Portal
We should now be able to access our Cacti Installation from the below URL. Be sure to replace the [Servers IP Address] with the IP of your server. If you have set a hostname or domain name, then you can use this as well.
http://[Servers IP Address]/cacti
Once you have loaded the site, you will need to accept the licensing, then move to the next steps. Then click Next.

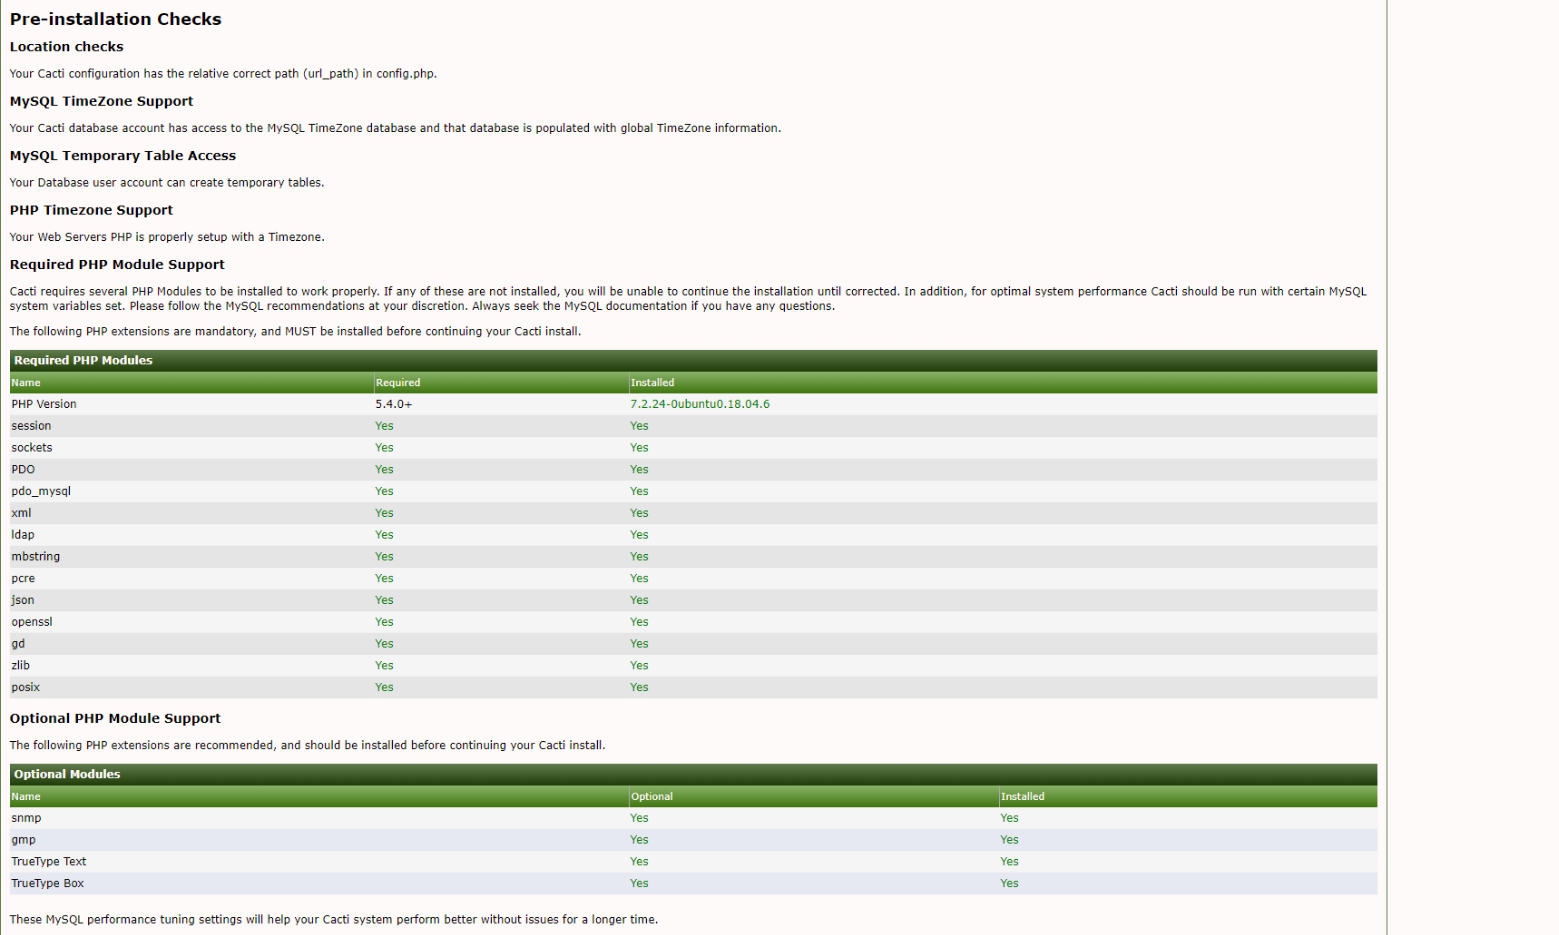
You can review the installation information to be sure that you have all of the required packages installed. If anything were to say no here, then you would need to install the mentioned package. Click Next.

Check installation packages made to the server.

Next, you will choose the server you would like. Since this is likely the first installation, you will want to select the primary server. Then click Next.

Installing a new Primary Server.
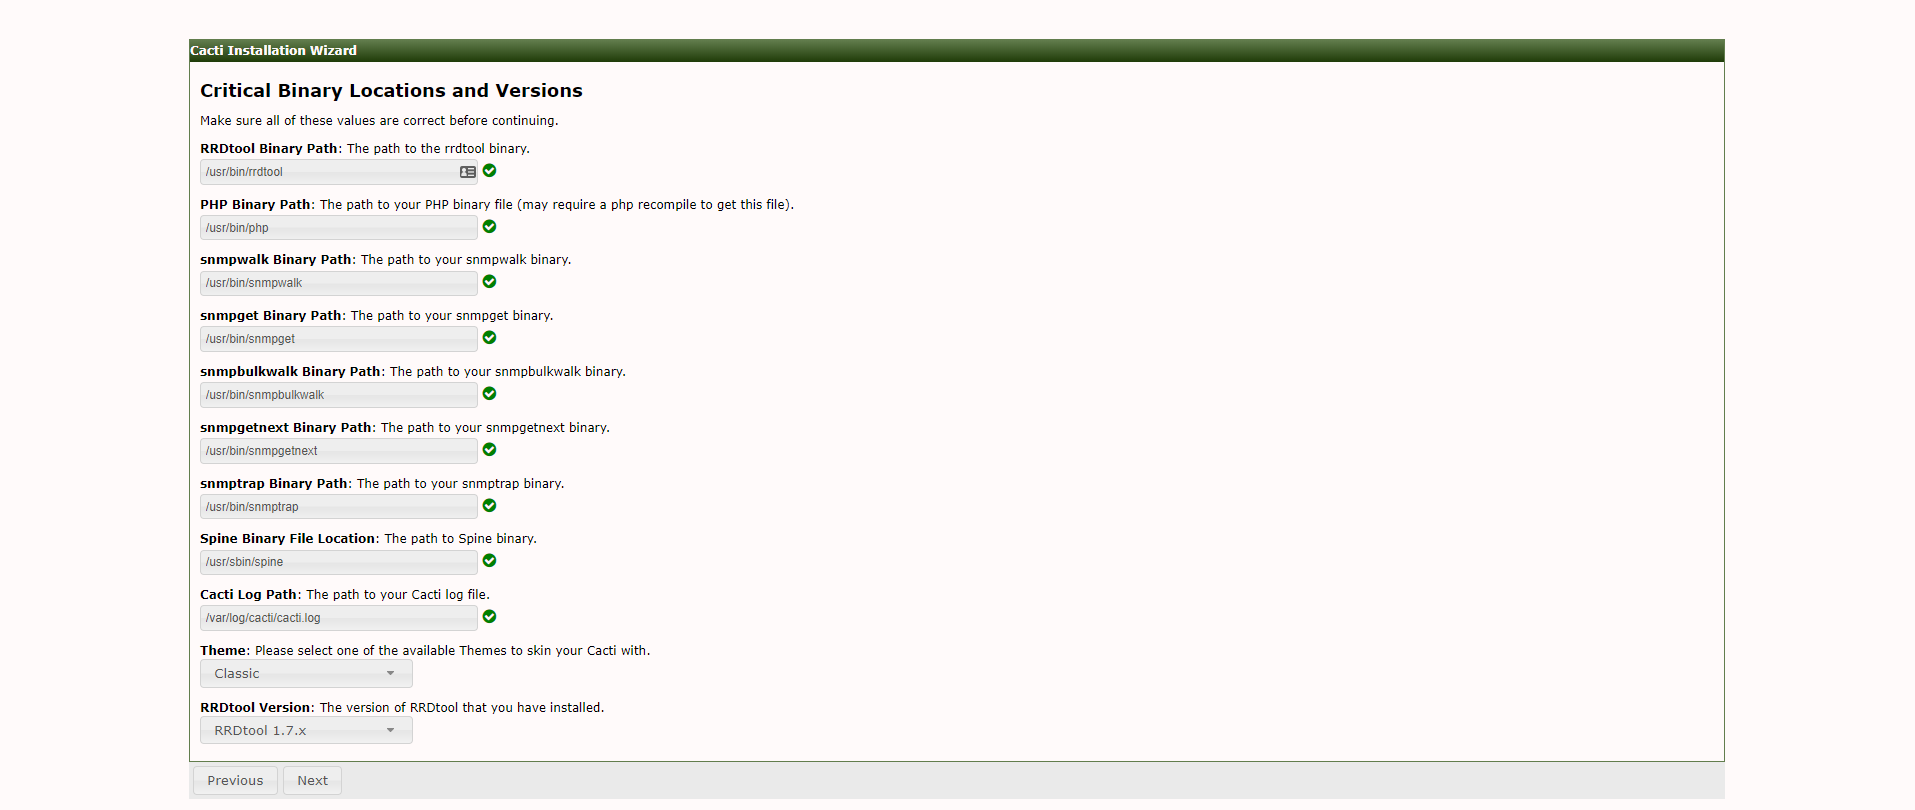
Be sure that all of the paths are correctly created for the server. Then click Next.

Confirm path installations for Cacti
Some of the directories will need to be set to read-only while we are creating the installation but do not need to be once we are finished. Please take note of the directories in case they need to update. Update the permissions by using the command at the bottom. You will need to update it to reflect the directory you are updating. Then click Next.
# Writable only during installation.
/usr/share/cacti/site/resource/snmp_queries
/usr/share/cacti/site/resource/script_server
/usr/share/cacti/site/resource/script_queries
/usr/share/cacti/site/scripts

# Writable after Installation is complete.
/usr/share/cacti/site/log
/usr/share/cacti/site/cache/boost
/usr/share/cacti/site/cache/mibcache
/usr/share/cacti/site/cache/realtime
/usr/share/cacti/site/cache/spikekill

chown -R apache.apache /usr/share/cacti/site/resource/
You can select and install cacti options for default servers. Since we are using an Ubuntu installation, you can select a Linux installation. However, if this is to monitor something else, then you can choose a default selection.
Login and Configure Cacti
You should now be able to log in to your Cacti installation using the default username and password, which are below for you.
Username: admin
Password: admin
Finally, you should be able to log in to your new Cacti installation to configure your server to monitor resources. This will conclude our installation guide for this time. You should now be able to further work with your Cacti Portal to configure the graphs for the resources that you would like to monitor on the server.
Written by Gregory Gilbert / June 19, 2020
