Hostwinds Tutorials
Search results for:
Table of Contents
How To Setup Notifications in WHMCS
Tags: WHMCS
Within WHMCS, you can configure the system to automatically send notifications over several channels from a wide variety of events. This article is for information and instructions on using these notification settings.
Setup Notifications
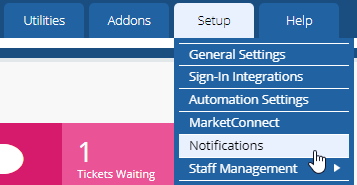
You can access the notification settings in WHMCS from the Admin interface and navigating to Setup -> Notifications_\._
Notification Channels
WHMCS provides support for sending notifications over email or through HipChat or Slack. To configure and activate each of these, click the Configure button below the channel you want to use and follow the instructions below.

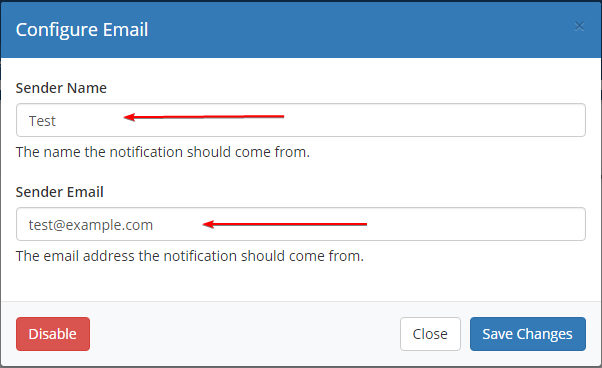
To configure Email notifications, provide a name and email address. This name and address will appear as the sender of the email to the notification's recipients. It does not matter if this email account is actually configured somewhere.
HipChat
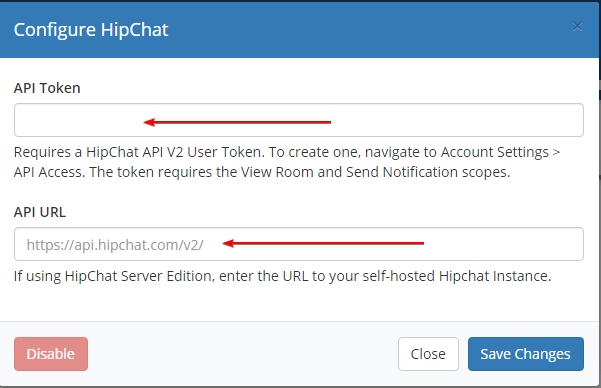
To configure HipChat notifications, you will need a HipChat account and need to generate an API token. To generate a HipChat API token, you will need to follow the appropriate instructions for your configuration and how secure you want to keep your token. The simplest way is described at the bottom as Personal access tokens under User-generated tokens. Then provide the API Token to where WHMCS asks for it, provide a URL to your HipChat server (if you're hosting it yourself), then save the changes.
Slack
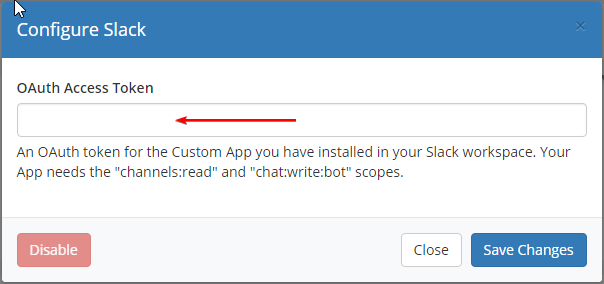
Similar to HipChat, to configure Slack, you must have a Slack account and generate a token for authentication. To generate an OAuth Access Token, you will need to register a new app here and give it the 'channel: read' and 'chat:write: bot' security scopes. The new application should be given a newly generated token. Then input your new OAuth Access Token to where WHMCS prompts for it and save the changes.
Notification Rules
To specify a trigger for sending notifications and with what content, begin by clicking the Create New Notification Rule button.
Then you will be prompted with the following interface:
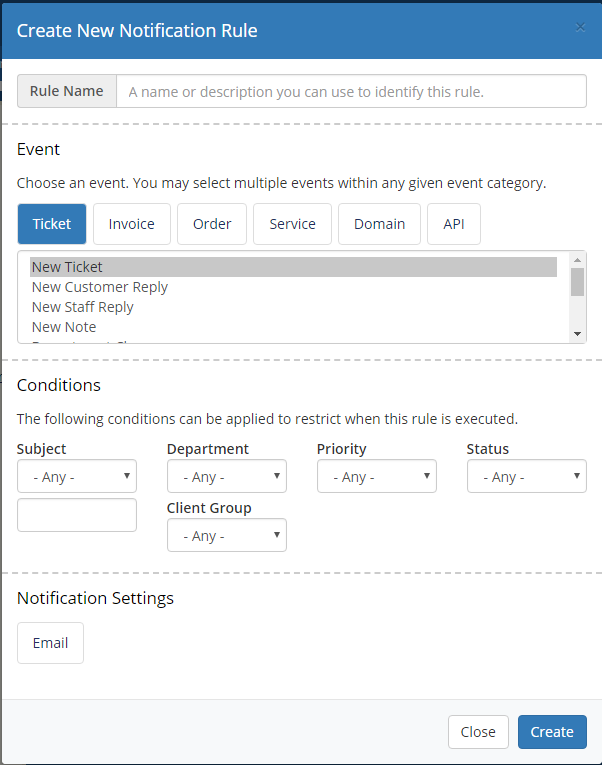
Give your new rule a name, then specify what will trigger a notification with the Event and Conditions categories.
The Event category lets you choose what the primary event is, and the Conditions categories let you filter it down further.
For example, you can turn on notifications for all new Technical Support tickets by selecting New Ticket from the Ticket section of the Event category, then select Technical Support from the Department drop-down in the Conditions category.
You can then specify how you want your notifications delivered by selecting either Email, HipChat, or Slack in the Notification Settings category. Only the notification channels you previously configured will appear in this section.
Each notification channel is slightly different, but each will ask what kind of content the notification should have and who or where the notification should be sent.
For example, the Email notification channel will ask which pre-made Email Template you want to use for the notification and a list of email addresses you want to send it to. To configure custom email templates, you can view our guide on the WHMCS Email Templates settings here.
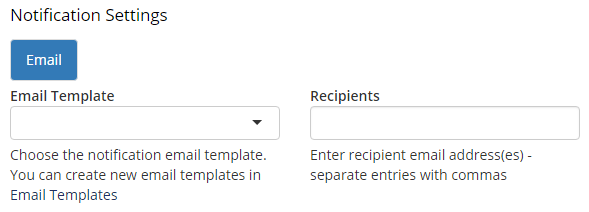
Once you have the notification rule configured how you like, click Create, and the rule will be created and activated. You can then view and manage that rule and all others from the main Notifications page.

Written by Hostwinds Team / August 29, 2018
