Hostwinds Tutorials
Search results for:
Table of Contents
How To Setup and Configure WHMCS Support
WHMCS gives you a wide variety of options for the support you provide to your clients. This article goes over the options and some basic setups of the support options available in WHMCS.
The support options can be found under Setup -> Support -> and then the sub-category you want to access.
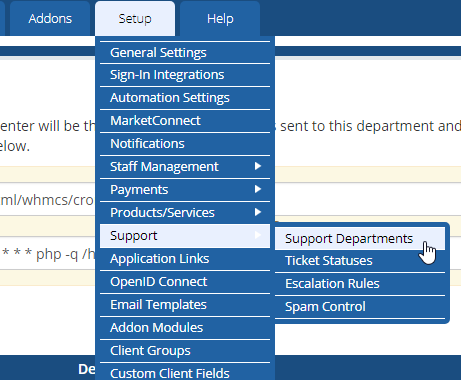
Support Departments
This page lets you view, add, edit, and remove different departments your clients can reach out to for support.
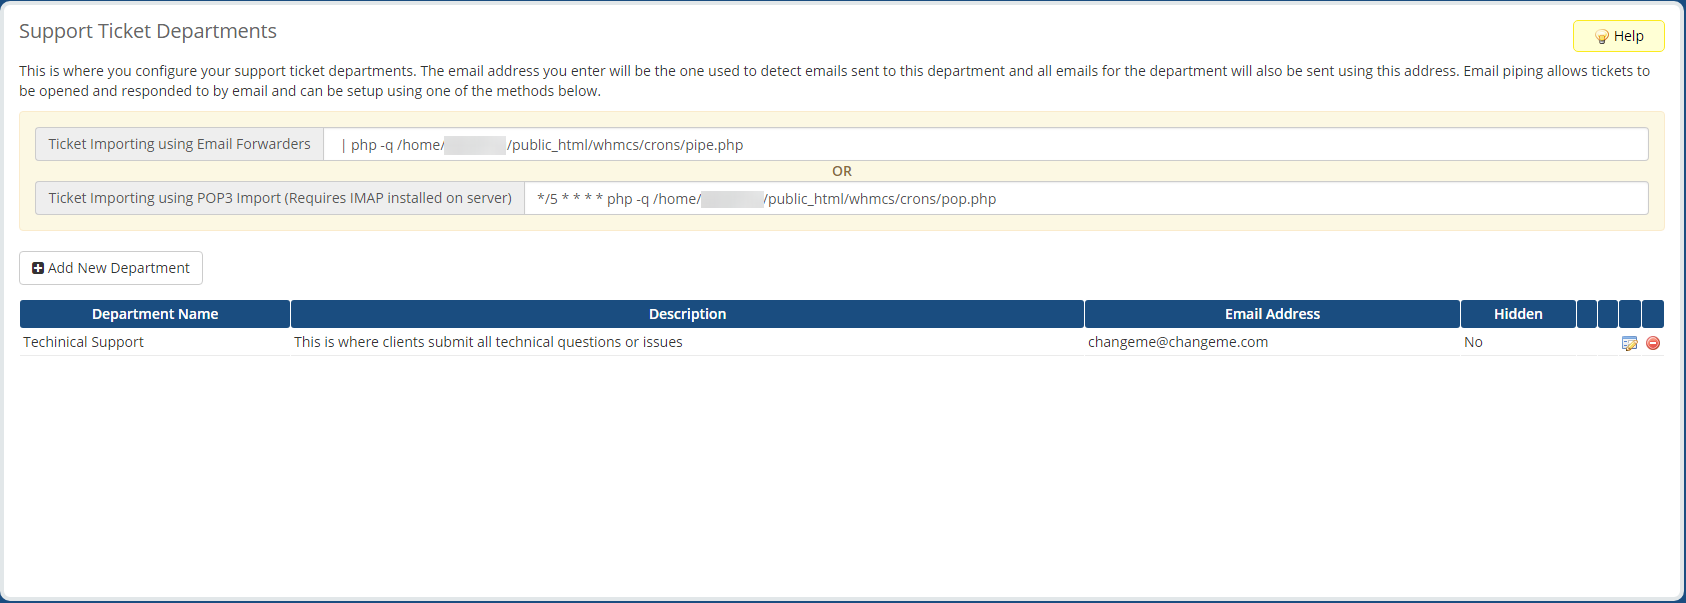
Add a New Support Department
To add a new support department, click the Add New Department button, fill out the following form and click Add New Department.
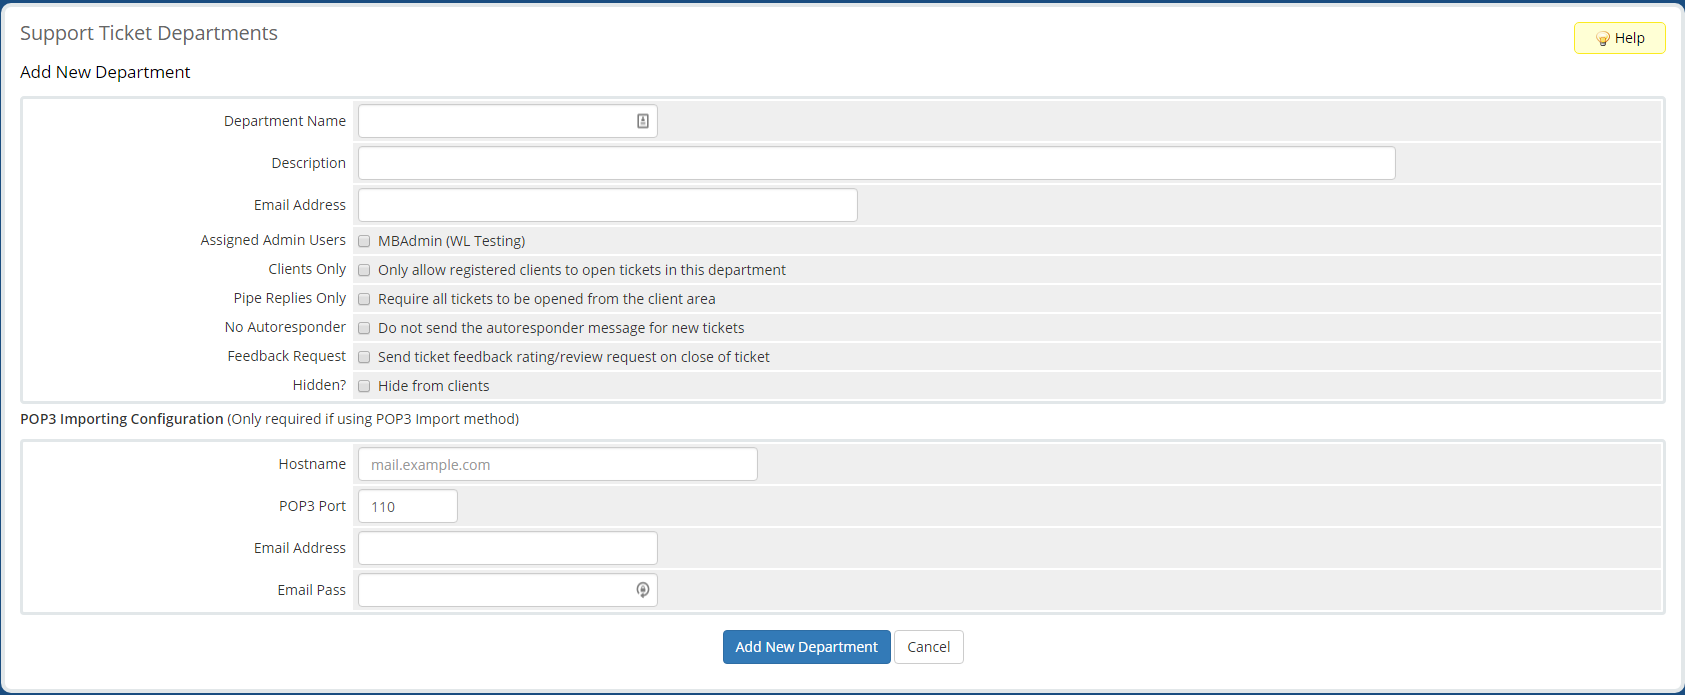
- Department Name: The name of the department.
- Description: The description of the department.
- Email Address: The email address for the department.
- Assigned Admin Users: Specifies which admins belong to the department.
- Clients Only: Specifies if only registered clients can create tickets to this department.
- Pipe Replies Only: Enabling this forces it so that tickets can only be made from the client area.
- No Autoresponder: Enabling this disables the autoresponse message on new tickets.
- Feedback Request: Enables sending the client a feedback rating/review request when a closed ticket to this department.
- Hidden: Specifies if this is a hidden department.
- POP3 Importing Configuration: Configuration for POP3. Only needed if using the POP3 Import method.
- Hostname: Hostname for the mail server.
- POP3 Port: Port for POP3 on the server.
- Email Address: Email address for login to the mail server.
- Email Pass: Password for login to the mail server.
Editing an Existing Support Department

To edit an existing department, click the Edit button next to the department you want to edit. You will be presented with the same form as when adding a new department. However, there is also a tab to manage custom fields in the department. Add, remove or adjust any custom fields you need on the department and click Save Changes.

- Field Name: The name of the field.
- Display Order: Position to display this field within the list of all custom fields.
- Description: Description of the field.
- Validation: Specifies regular expressions to use for input validation.
- Select Options: Specifies the available options of a dropdown list. Only applicable for dropdown lists. Separate items with commas (,).
- Admin Only: Specifies if the field is for admin use only.
- Required Field: Specifies if the field is required.
Ticket Statuses
This section lets you customize your support tickets' statuses and how tickets with each status appear within the ticketing system.
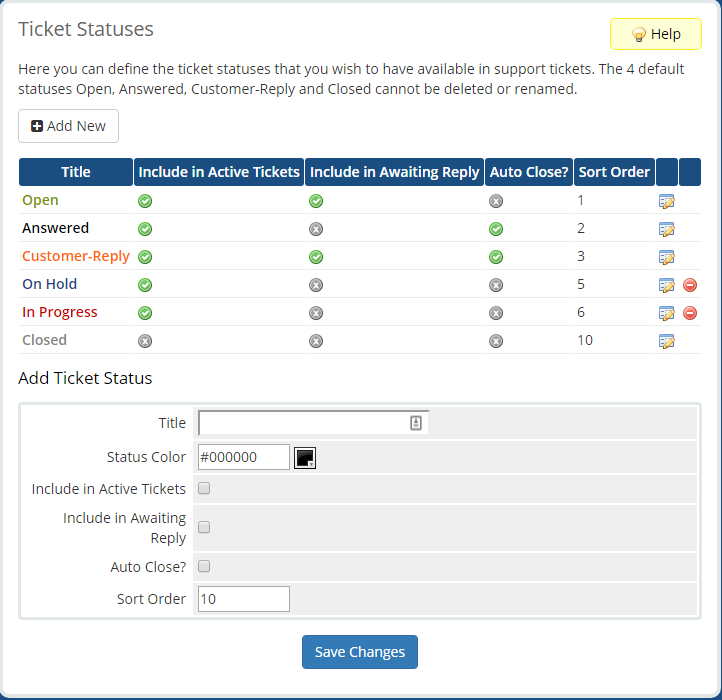
Adding a New Ticket Status
Add a new ticket status, fill out the form at the bottom of the page with the configuration you want, and click Save Changes.
- Title: The title of the status.
- Status Color: The color the status text appears as.
- Include in Active Tickets: Specifies whether the status should be considered as active status.
- Include in Awaiting Reply: Specifies whether the status should be considered as an awaiting reply status.
- AutoClose?: Specifies whether the ticket should be auto close.
- Sort Order: Specifies the order/priority a ticket with this status should have in the ticketing system. The lower the number, the higher the priority.
Editing an Existing Ticket Status

All ticket statuses are available to edit by clicking the Edit button. This will fill the form at the bottom with the configuration for that status. Adjust the values as needed and click Save Changes.
Removing an Existing Ticket Status

To remove a ticket status from the system, click the Remove button next to the status you want to remove.
The Open, Answered, Customer-Reply, and Closed statuses cannot be removed.
Support Ticket Escalations
This page lets you specify rules to trigger automatic escalation on tickets.
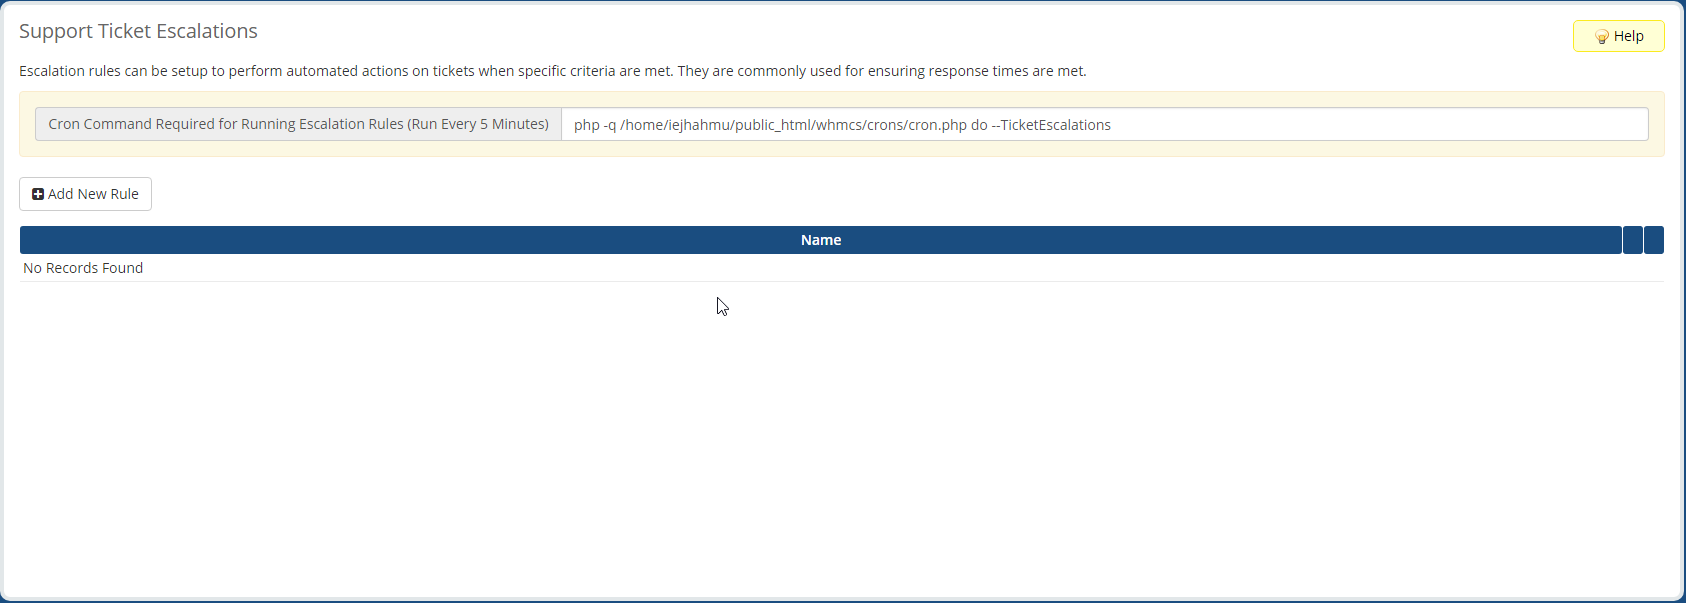
On this main page, you'll find a list of existing rules with buttons next to each to allow editing or removal of the rules.
Adding a New Rule
To add a new escalation rule, click the Add New Rule button and fill out the following form:
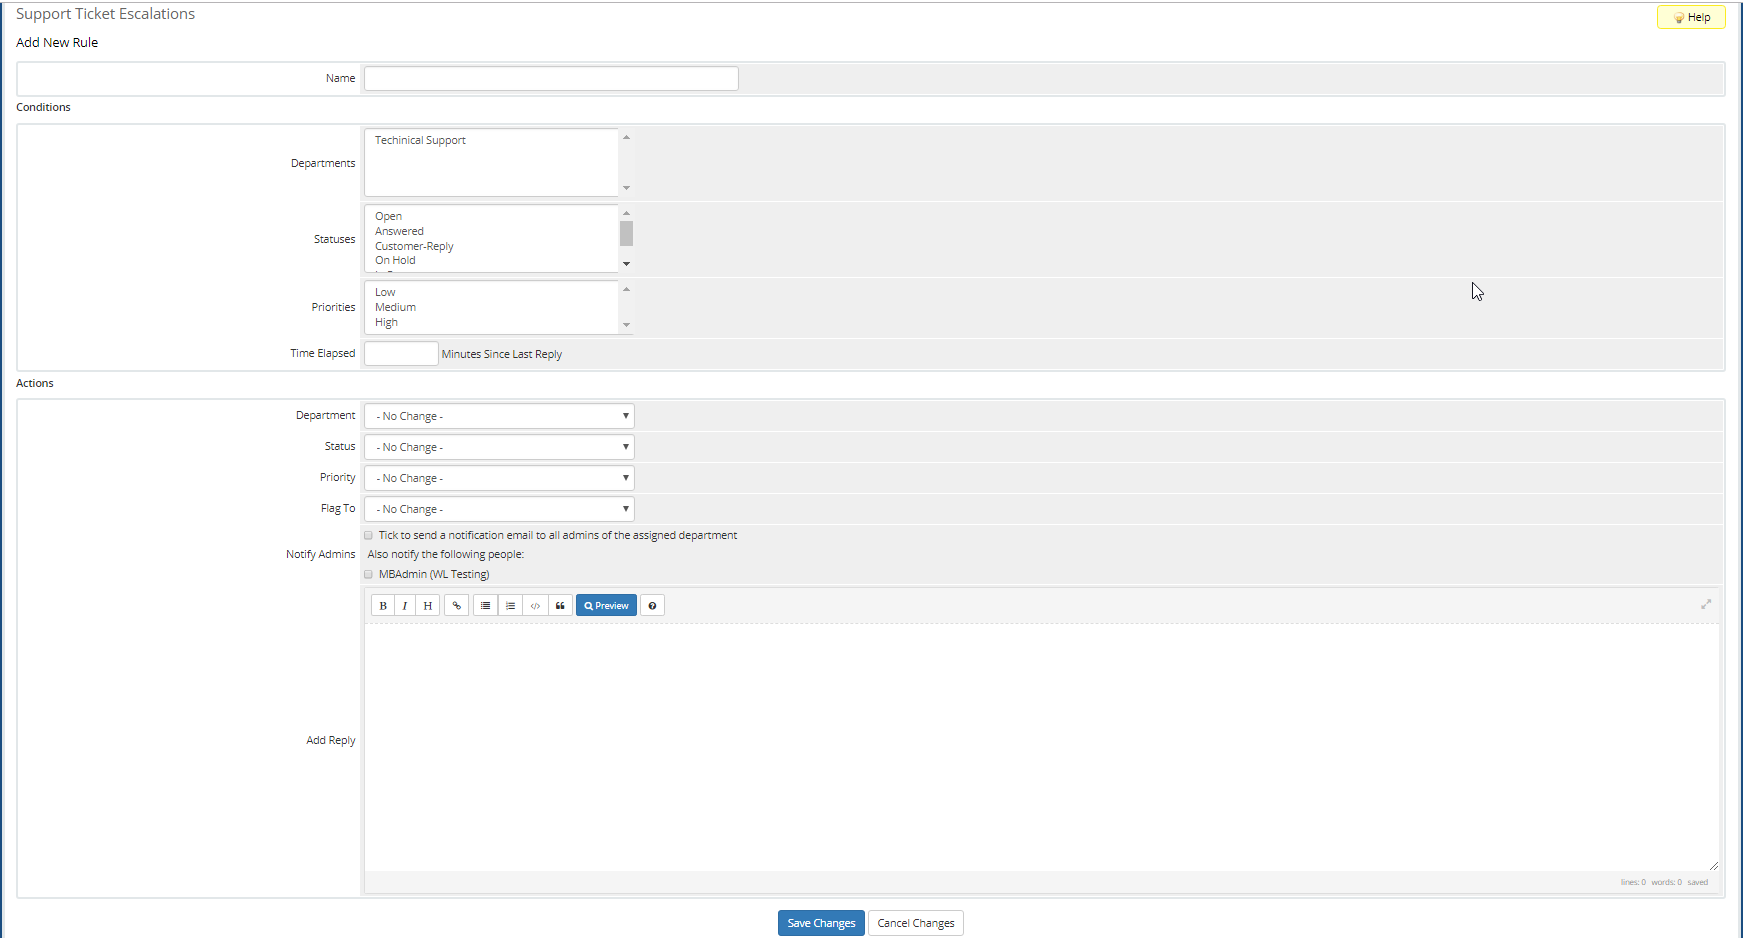
- Name The name of the rule.
- Departments: Specifies which departments this rule applies to tickets for.
- Statuses: Specifies which statuses this rule applies to tickets for.
- Priorities: Specifies which priorities this rule applies to tickets for.
- Time Elapsed: Specifies the minutes since the last reply for tickets this rule applies to.
- Department: Specifies any change in the department you want to be made in the escalation.
- Status: Specifies any change in status you want to be made in the escalation.
- Priority: Specifies any change in the priority you want to be made in the escalation.
- Flag To: Specifies any admins you want the ticket to be flagged to in the escalation.
- Notify Admins: Specifies if any or all admins should receive a notification email on the escalation.
- Add Reply: Specifies the text to auto-reply to the ticket within the escalation. Leave blank for no reply.
Support Ticket Spam Control
This page lets you specify rules to block tickets based on the sender, subject, or matching phrases in the ticket's body. There are three tabs to list each blocking, with buttons to remove each entry.

Adding a New Spam Control
TAdda new spam control filter, use the fields at the top of the page to select the type of filter and what value it should look for matches for, then click Add New Spam Control.
Written by Hostwinds Team / September 11, 2018
