Hostwinds Tutorials
Search results for:
Table of Contents
How To Manage SSH Keys With WHM
Tags: WHM
WHM access is not available for our shared and/or business shared clients as this requires root access and the license. For more information on how to log into your WHM interface, please review How to Get Started with your New cPanel Server.
Managing SSH Keys with WHM
To manage SSH keys, follow this guide, as it will show you how to add, import, and manage them with your server. SSH keys will be divided into two types: public and private.
Step 1: Log in to your WHM account
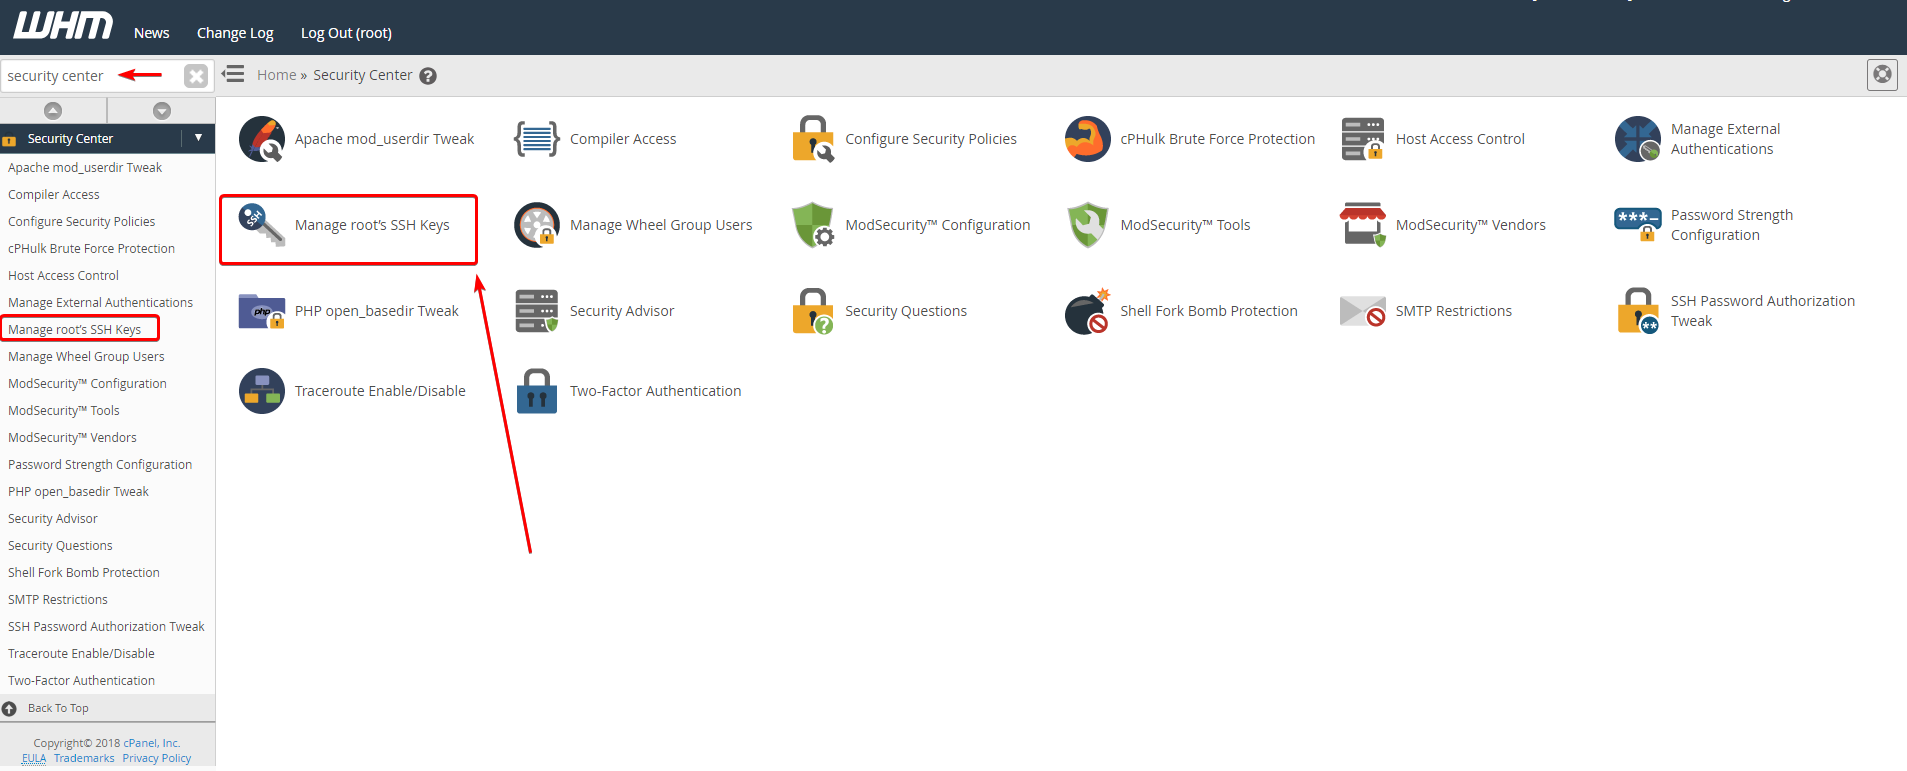
Step 2: Click on the Security Center button

Step 3: Click on Manage root's SSH Keys button

You can equally search for the security center in the WHM search box in the top left and then click on Manage root's SSH Keys under the available options within the column.
How Do I Generate A New SSH Key?
This section will show you how to generate a new key, public or private.
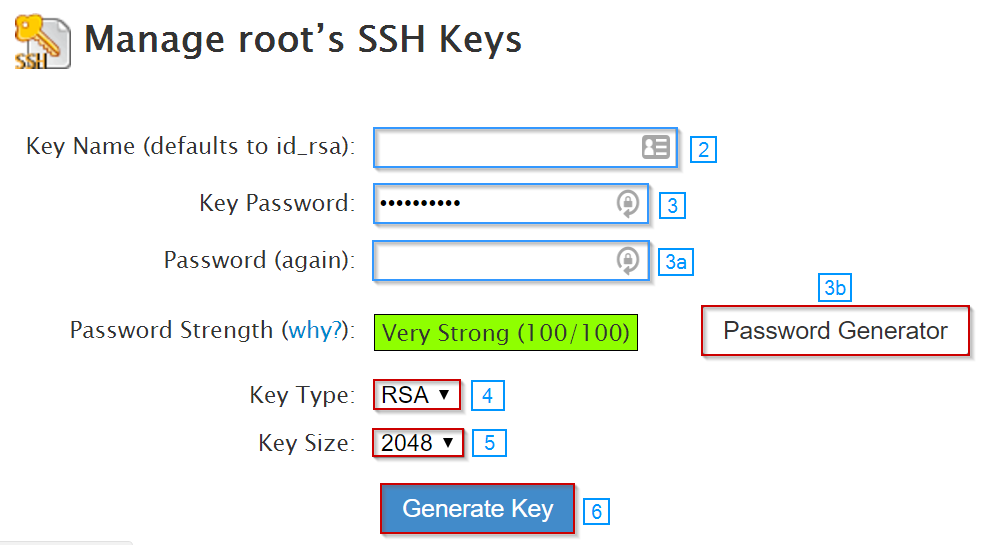
Step 1: Click the Generate New Key button.

Step 2: Create a unique key name in the Key Name text box
Step 3: Enter a password for the key name if you wish
- 3a: Confirm password, if necessary
- 3b: You can use the Password Generator to generate a random password
Step 4: Pick your preferred Key Type
- RSA – Faster verification times
- DSA – Faster generation and signing times
Step 5: Select your preferred Key Size
Larger the size, the better the security, but the slower the authentication speed
Step 6: Click the Generate Key button

How Do I Import An SSH Key?
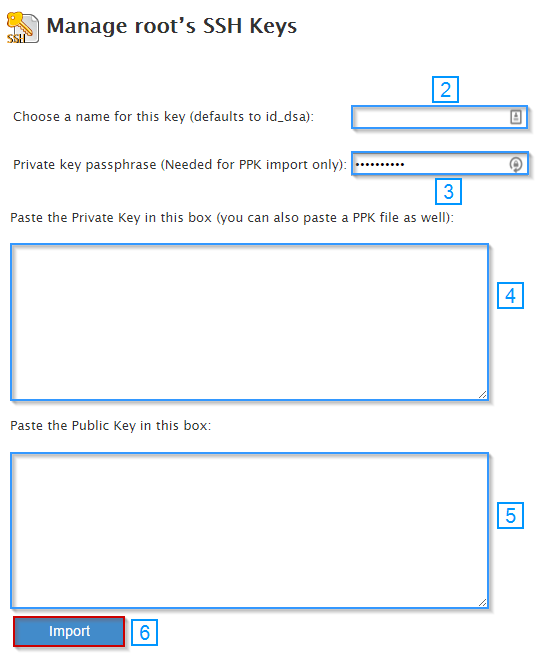
Step 1: Click the Import Key button.

Step 2: Create a custom key name in the first text box
a. When you create a custom key name, the SSH key must be specified when you log in to server b. To be specific, you'll need to run the following command:
ssh user@example -i /root/.ssh/key_name
Step 3: Enter the Private key passphrase in the text box if you're using a PPK (PuTTY Key Generator) file
Step 4: Paste the Private key into the box
Step 5: Paste the Public key into the box
Step 6: Click the Import button

How Do I Manage The Keys?
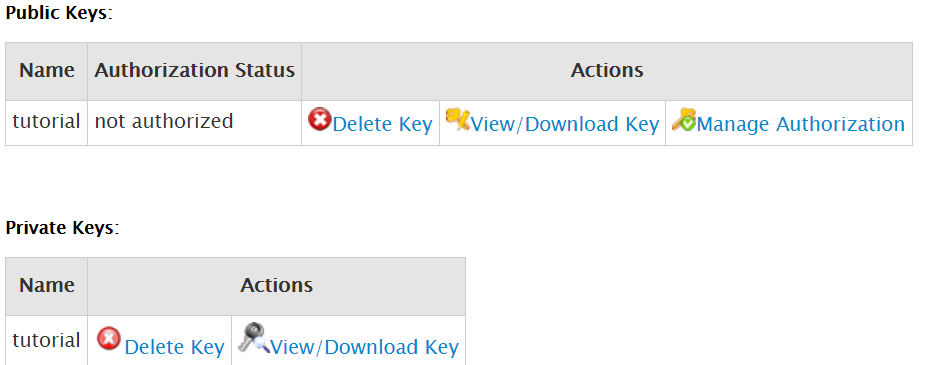
You can manage the keys you create and import through the Public and Private Keys tables at the bottom of the Manage root's SSH Keys section. You can perform the following actions: Delete Key, View/Download Key, and Manage Authorization.

Written by Hostwinds Team / December 13, 2016
