Hostwinds Tutorials
Search results for:
Table of Contents
Steps to Install and Setup an SSL from Scratch
Tags: SSL
This guide starts after you've fully generated your CSR request and received the official SSL from the certificate authority (CA). With your SSL email in place, follow the steps below to install it on your website.
How Do I Install an SSL On My Website?
Step One: Log in to your cPanel account
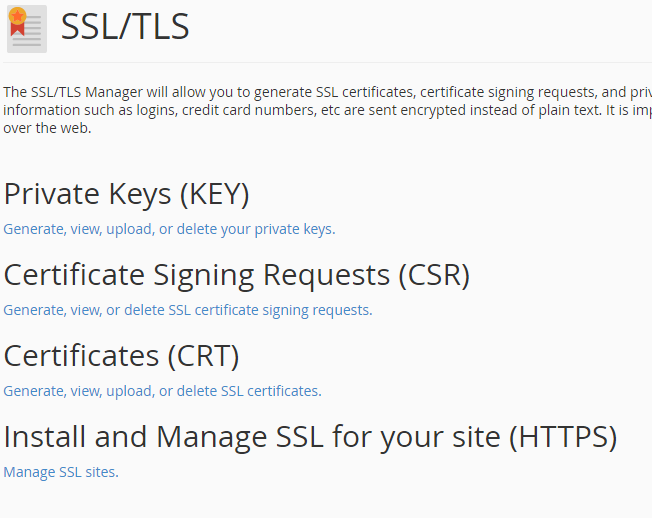
Step Two: Navigate to the Security section and click on SSL/TLS Wizard.

Step Three: Click on the Install and Manage SSL for your site (HTTPS)
a. Manage SSL button

Step Four: Scroll down to Install an SSL Website

Step Five: Select your domain from the dropdown box

Step Six: Copy and paste the Certificate from your email into the text box.

Step Seven: Click the Autofill by Certificate button.
a. This will fill the Private Key and Certificate Authority Bundle text box
Step Eight: Click the Install Certificate button

Step Nine: A pop up will confirm your certificate is installed
Congratulations! You've now successfully installed your SSL on your website and should see the new green bar with the HTTPS in the URL indicating that your site is secure.
Written by Hostwinds Team / December 13, 2016
