Hostwinds Tutorials
Search results for:
Table of Contents
How Do I Install Joomla Easily With Softaculous?
How to Install Joomla Using Softaculous
Tags: Softaculous, Joomla
How Do I Install Joomla Easily With Softaculous?
How Do I Install Joomla Easily With Softaculous?
- First, you will want to Go to your cPanel, which can be accessed from the Hostwinds Client Area or yourdomain.com/cpanel.
- Next, you will want to navigate the Software section of the cPanel (usually near the bottom) to find the _Softaculous Apps Installer.
_

- Click on the Softaculous Apps Installer icon to be brought to another page.
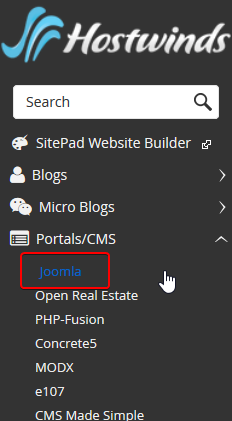
- If you do not see Joomla listed in the Top Scripts, you can click on Portals/CMS on the left. This will show Content Management Systems that can be installed. You will want to find Joomla from the list and click on it.
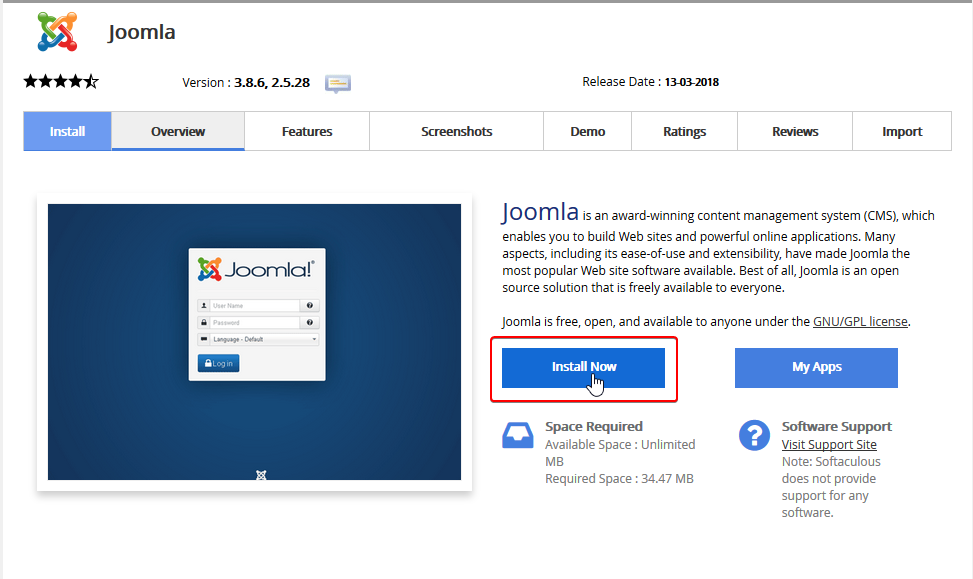
- Once you have the Joomla Overview page up, you will see a button that states Install Now. Click this to be brought to a page for the final steps of the installation.
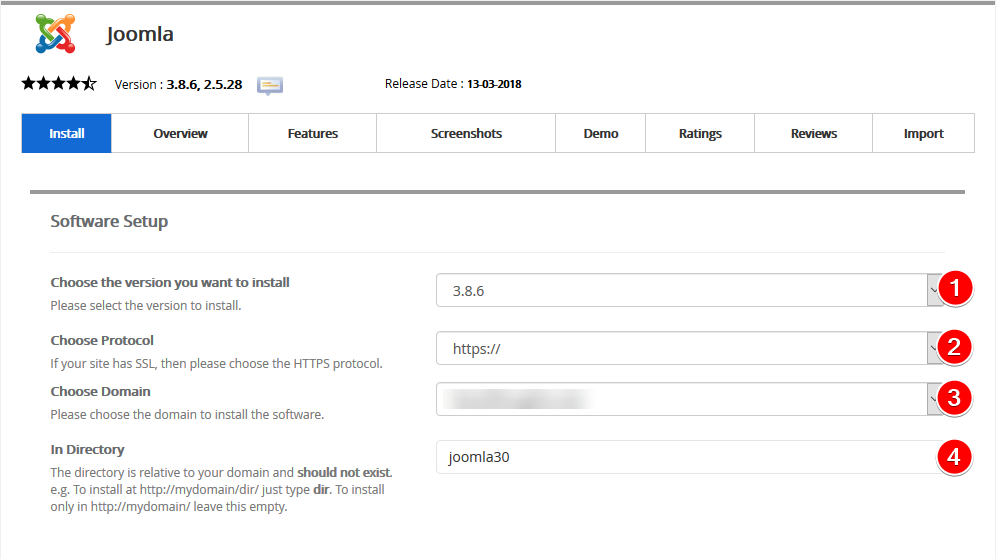
- After you have clicked the Install Now button, you will be brought to a page for the last steps of the installation. Here you will enter information to get Joomla set up and installed on your website.
- First, select the version of Joomla that you would like to have installed. It is often recommended to go with the newest version due to fixes that have been implemented.
- Next, you will want to choose the Protocol. Basically, whether or not you want traffic to be encrypted by default for Joomla. More about SSL Encryption can be read here.
- For the Domain, you will want to choose the Site that you are installing Joomla for or where it will be accessed from.
- The In Directory field is used if you want it to be in a subdirectory of your domain. Such as yourdomain.com/joomla. If you want it to be installed on the main domain (yourdomain.com), leave this blank.
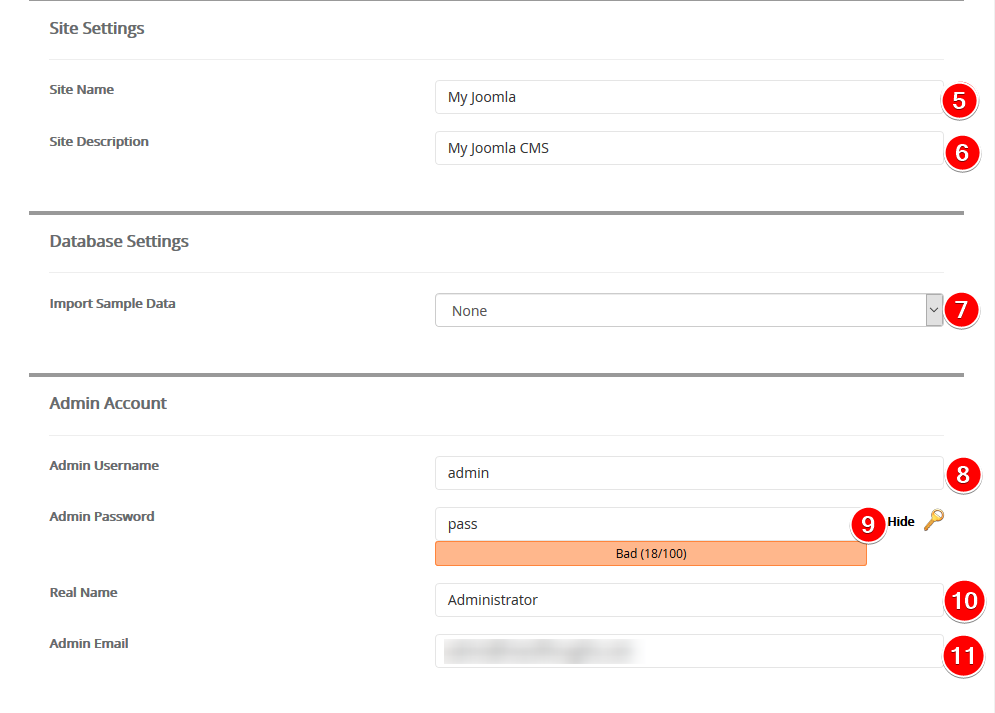
- This will be the name of your site. If this is a blog, you will want to put that name here.
- For the Site Description, you will usually summarize what your site is about in a couple of sentences.
- You can use this option to import some sample data on your site so that you can see what it would look like with actual content later on.
- This is where you will put your Admin username. It is recommended to change this from admin so that this username is unique and cannot be easily guessed.
- Here is where you will set the password used for logging in along with your Admin Username. You will want to make sure that it is nice and secure to make sure it does not get guessed easily. There is a meter that can help gauge how strong the password is and a password generator to help you generate a strong password.
- The Real Name field will be your real name. You can put whatever you want here as well. Joomla only uses this to identify you.
- Admin Email will be the email that you want all your emails to be sent by Joomla.
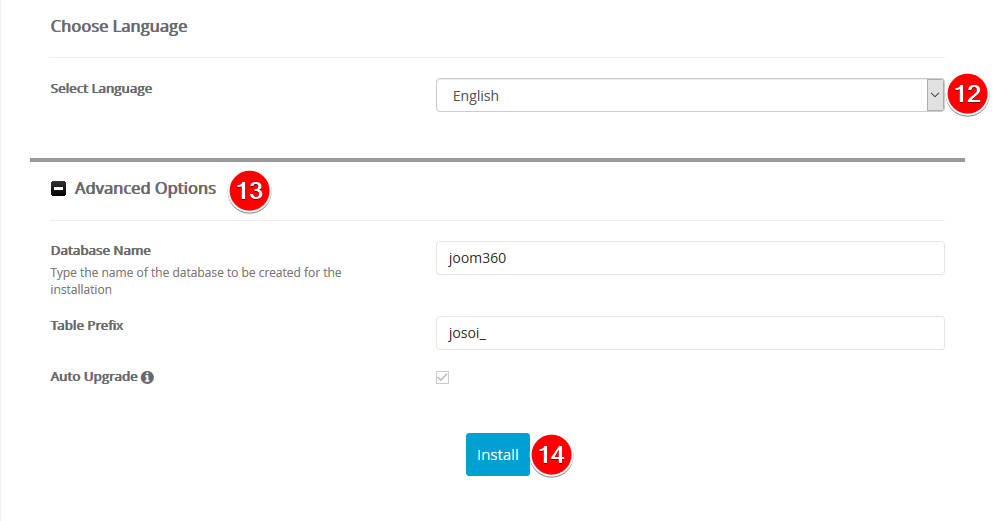
- Here you would put the native language of your site. This would be what the interface is translated to and what the content will be written in.
- These Advanced Options are not entirely necessary. However, if you want to change the Database Name and Table Prefixes, you can do so here.
- Once you have filled out all the fields correctly, you would Click the Install button to complete the setup.
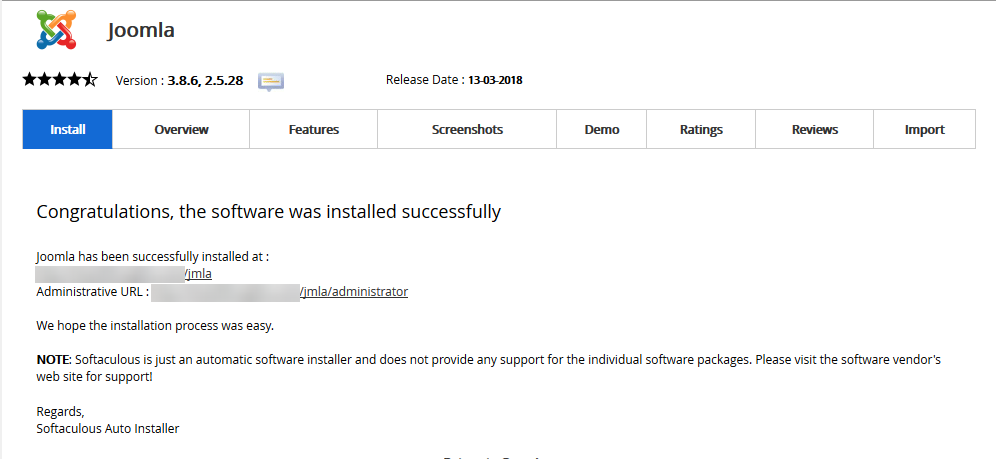
Once the installation has been completed, you will be brought to a page that will say the installation was completed successfully. This page will also have links to where you can access your Joomla site, as well as the Administrator Dashboard for Joomla. It is important to save these details in a secure location if you need to reference them later.
If uld require any assistance, you can contact us in LiveChat or submit a ticket.
Written by Hostwinds Team / August 21, 2017
