Hostwinds Tutorials
Search results for:
Table of Contents
How To Access WHMCS Connect
Tags: WHMCS
A unique feature included with WHMCS is WHMCS Connect. With WHMCS Connect, you can easily manage your servers by accessing their control panel with the click of a button (rather than having to enter in credentials each time).
How To Access WHMCS Connect
Step One: Log into your WHMCS Dashboard
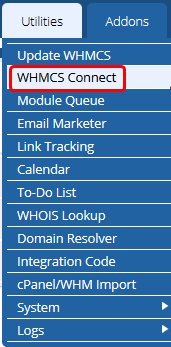
Step Two: From the WHMCS Dashboard, in the top menu, navigate to Utilities -> WHMCS Connect

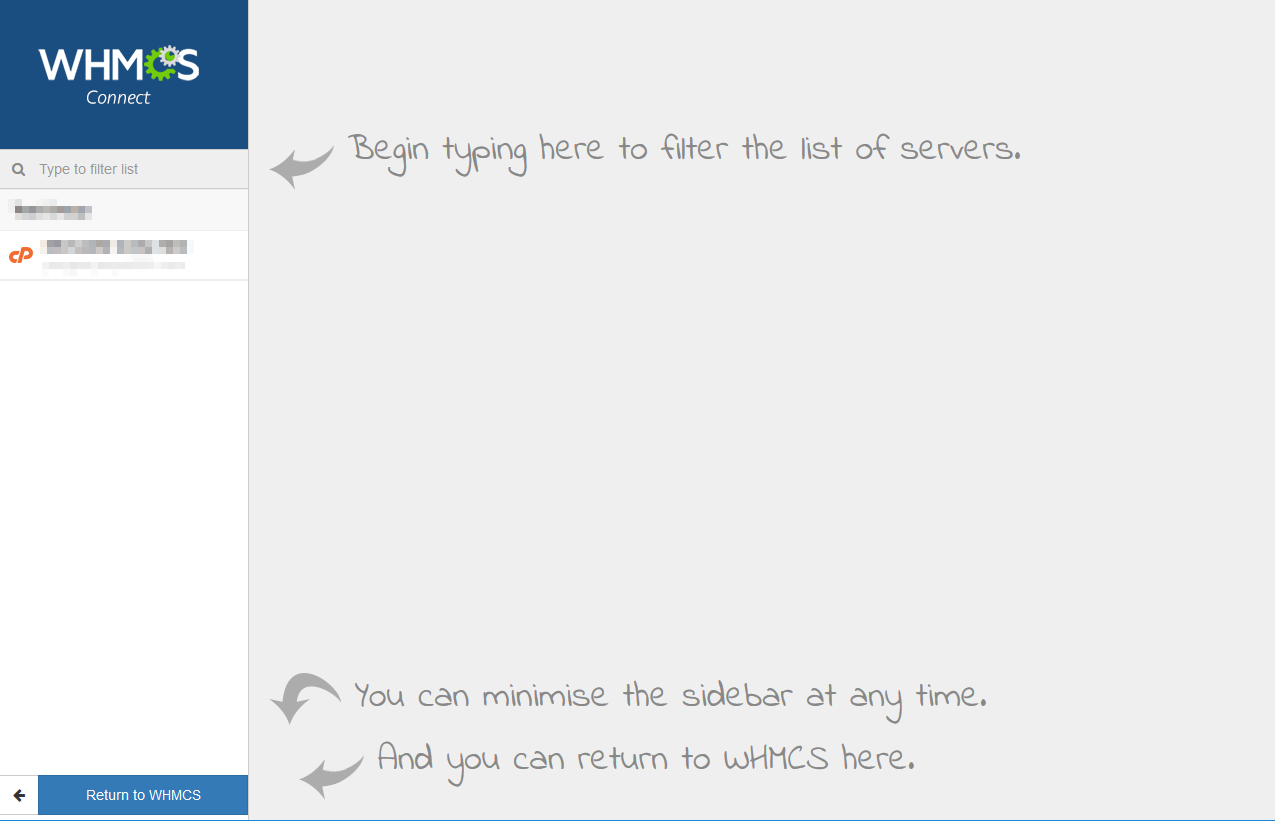
Step Three: From this next page, you will be able to see a list of all your added servers on the left side of the screen by default. You can also filter through the Servers based on Name or group as well.

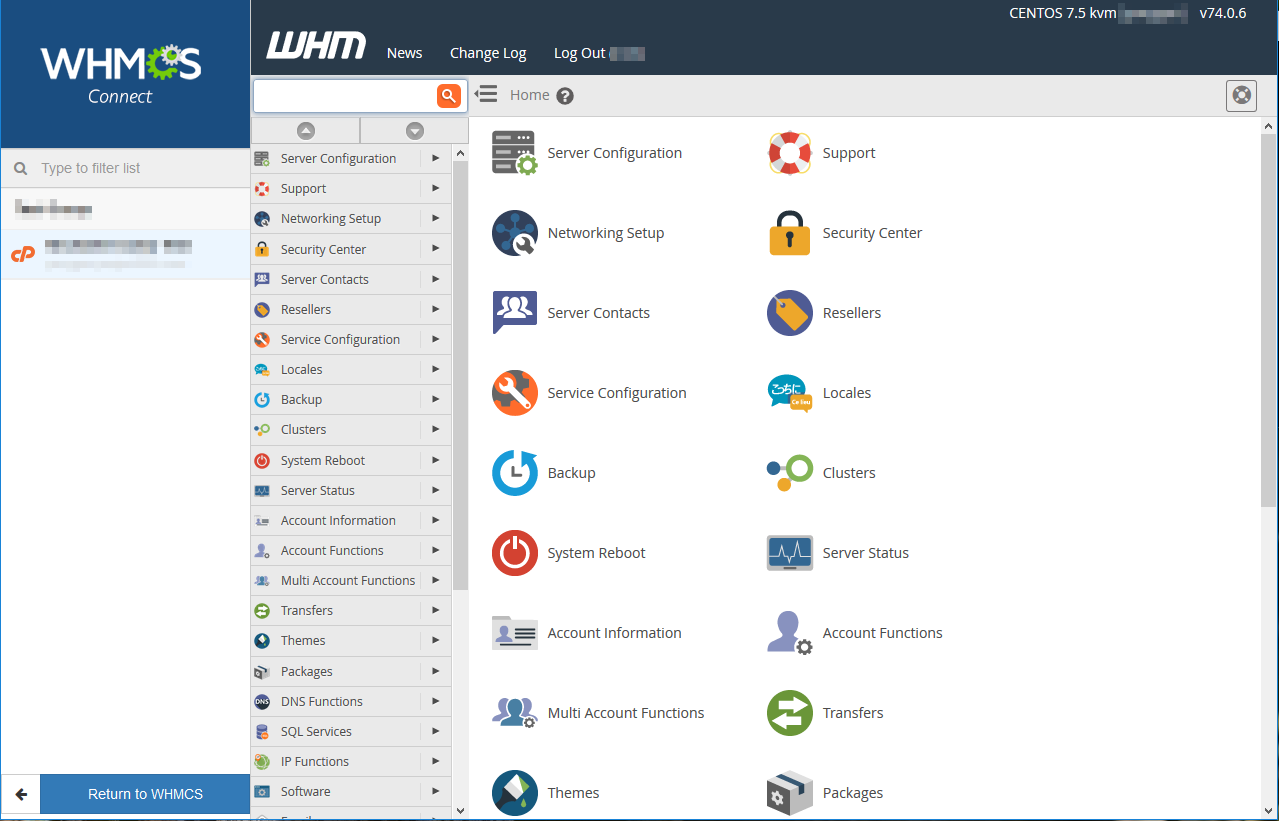
Step Four: Find the server you want to connect to and click on it from the list on the left side of the page. If set up correctly, the Larger Window on the right will display the Control Panel or, in most cases, the WHM of the server.

If you do not see your server listed, it may not have been configured correctly or needs to be added as a server. To add a server to your WHMCS, this can be done in Setup -> Products / Services -> Servers.
If you should have any questions or would like assistance, please contact us through Live Chat or by submitting a ticket with our Technical Support team.
Written by Hostwinds Team / September 4, 2018
