Hostwinds Tutorials
Search results for:
Table of Contents
Setting up Email Forwarders
Email forwarding can set up an inbox that receives incoming communication and then sends it out to a different email address automatically. Email forwarding provides significant benefits by sending incoming emails from multiple accounts to a single location for easier reading and organization. This is extremely useful to businesses with various email addresses.
In cPanel, you're able to create two different types of forwarding: Account Forwarders and Domain Forwarders. Account Forwarders act individually per email account and require set up separately as well.
Domain Forwarders pertain to a domain address with multiple email accounts associated and send many emails from that domain to another one. Note that domain forwarders will override individual account forwarding settings when in use.
Note: To follow the content of this article, you will need to log in to your cPanel dashboard.
How to Setup Email Forwarders In cPanel
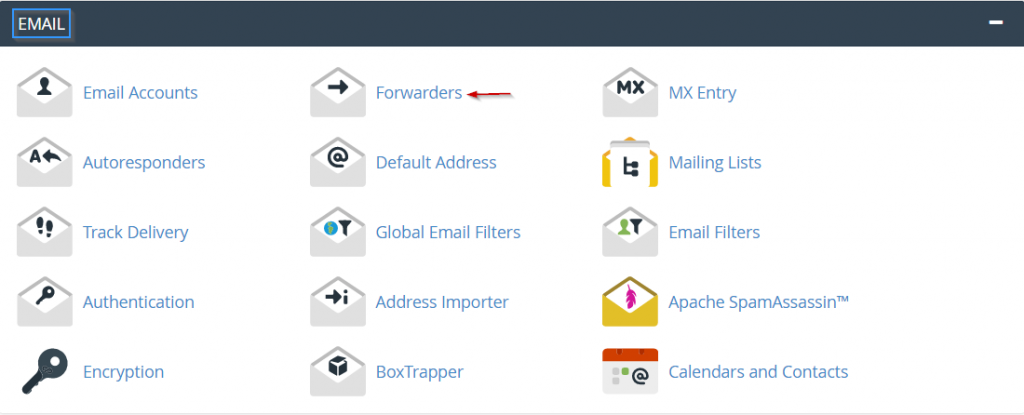
To add an email forwarder through cPanel, click on the Forwarders link to the Email Section in the cPanel dashboard. From there, click on the blue Add Forwarder button.


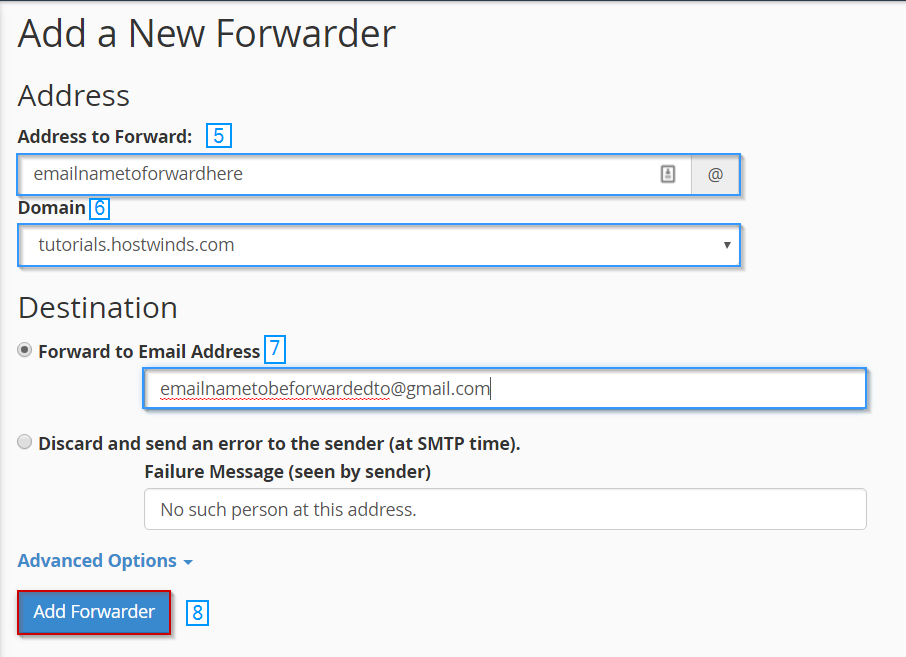
In the Add, a New Forwarder section, enter the email address you want the mail forwarded from and select from a list of your domains using the Domain dropdown. Next, enter the destination email address in the Destination/Forward to Email Address text-entry box. Once you have done so, click on the blue Add Forwarder button.
Once you've completed the process, the new forwarder will show up on the list of added names at the bottom of the page.

How to Setup An Email Forwarder Through Webmail
To set up your Email Forwarder through the web-based email client Webmail, follow these steps:
To begin, you will need to log in to your Webmail client. Note that you can log in from multiple avenues, and to learn how to do so, read Hostwinds' tutorial about accessing and reading webmail.
From the cPanel dashboard, click on your username dropdown in the top navbar, and click on the Forwarders link.
If you do not already have a Forwarder set up, click on the Add Forwarder button to do so. Complete the Forward to Email Address text-entry box in the same manner as mentioned earlier in this article and then click on the blue Add Forwarder button.
Once you set up the Forwarder, confirm that the option is correctly set up by returning and confirming in the Forwarder area.
How Do I Setup a Domain Forwarder Through cPanel
To set up your Domain Forwarder through the web-based email client Webmail, follow these steps:
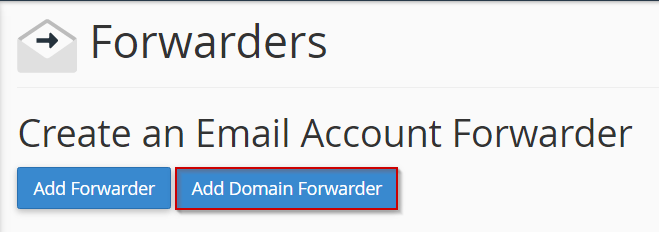
From the cPanel dashboard, click on your username dropdown in the top navbar, and click on the Forwarders link. From there, you will need to click the blue Add Domain Forwarder button.


In the Domain dropdown, select the domain you want to send emails and in the text-entry-box to the right of the dropdown, enter the domain it will forward to. Make sure to review these and once you've confirmed the fields are correct, click on the blue Add Domain Forwarder button. Once you've done so, move to the Forward All Email for a Domain section and review it to confirm the domain forwarding is working.


Written by Michael Brower / December 13, 2016
