Hostwinds Tutorials
Search results for:
Table of Contents
How to Edit DNS Records in Vesta Control Panel
While Vesta automatically generates the common DNS records for a domain when you add a Web Domain, Mail Domain, or DNS Domain, it does provide the opportunity to edit records as needed.
Editing the Domain information
Step 1: Log into Vesta at YourServerIP:8083 on your server.
Step 2: Click on the DNS section of the header.

Step 3: Move your mouse pointer over the domain you wish to edit, and click the Edit button in the top right of that section.

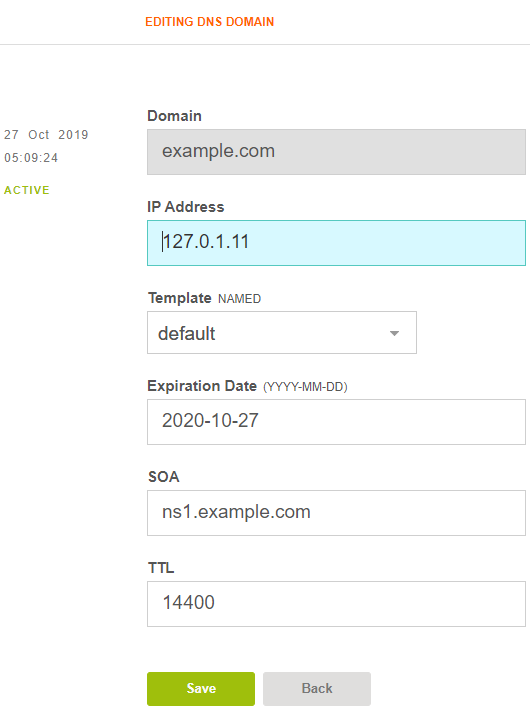
Step 4: Adjust the IP address, Template, SOA (master nameserver), or TTL for the record as necessary, then click Save.

Displaying and editing existing DNS records
Follow Steps 1 and 2 above to get to the DNS section of Vesta.
Step 3: Move your mouse pointer over the domain you wish to see the records for, and click List X Records in the top right of that section.

This will show all the records Vesta has for the domain.
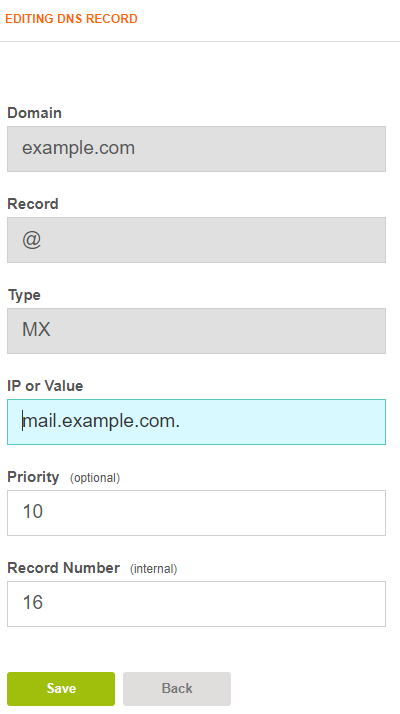
Step 4: If you wish to edit an existing record, move your mouse pointer over it and click the Edit button.
Step 5: Adjust the IP or Value, and optionally Priority, and click Save.

Adding DNS records
Follow Steps 1 and 2 above to get to the DNS section of Vesta.
Step 3: Move your mouse pointer over the domain you wish to add a record to and click Add Record in the top right of that section.

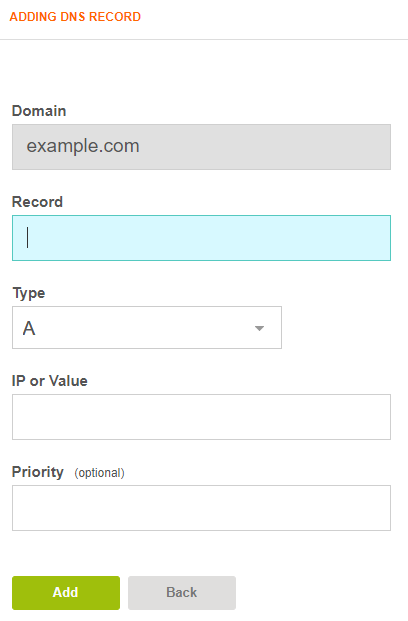
Step 4: Enter the details for the record.

- The record will be the 'name' of the record, e.g. 'www' for a WWW CNAME or @ for records affecting the whole domain.
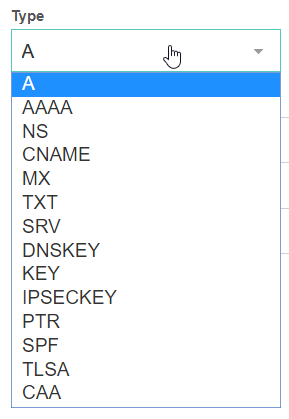
- The type will be one of A, AAAA, MX, CNAME, etc.
- IP or Value will be the target IP of an A record or alias domain of a CNAME.
- Priority will be the MX record priority for MX records.

Step 5: Click Add. You will see a 'Record has been created successfully' message above the entry form.
Written by Evan Winter / October 29, 2019
