Hostwinds Tutorials
Search results for:
Table of Contents
Edit WordPress Details from Softaculous
Tags: WordPress, Softaculous
If you have installed WordPress using Softaclous Apps Installer and need to edit the details of an existing WordPress installation for your Hostwinds service, this guide is for you. Regardless of if you are using your hosting plan's access to Softaculous or are using cPanel with a VPS or Dedicated Server and have purchased a Softaculous license, the method we will cover in this guide will work for you.
Change WordPress Installation Details
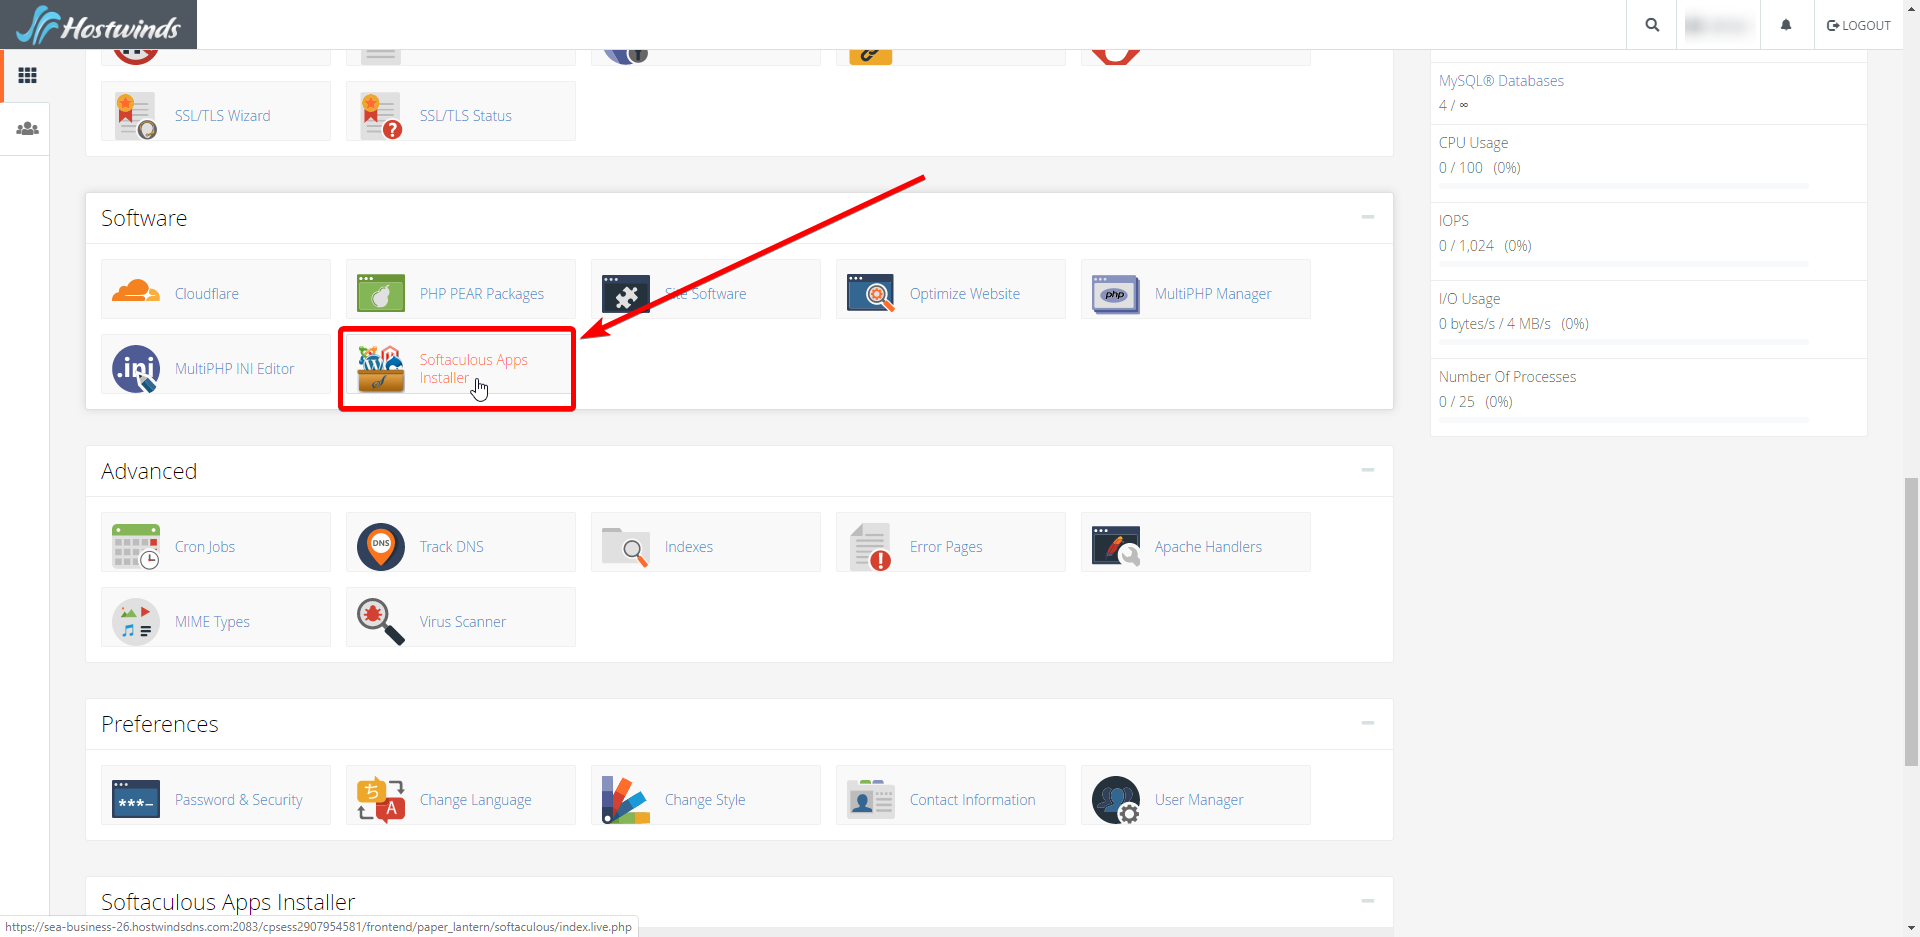
After accessing your cPanel account, scroll down to the Software tab and select Softaculous Apps Installer.
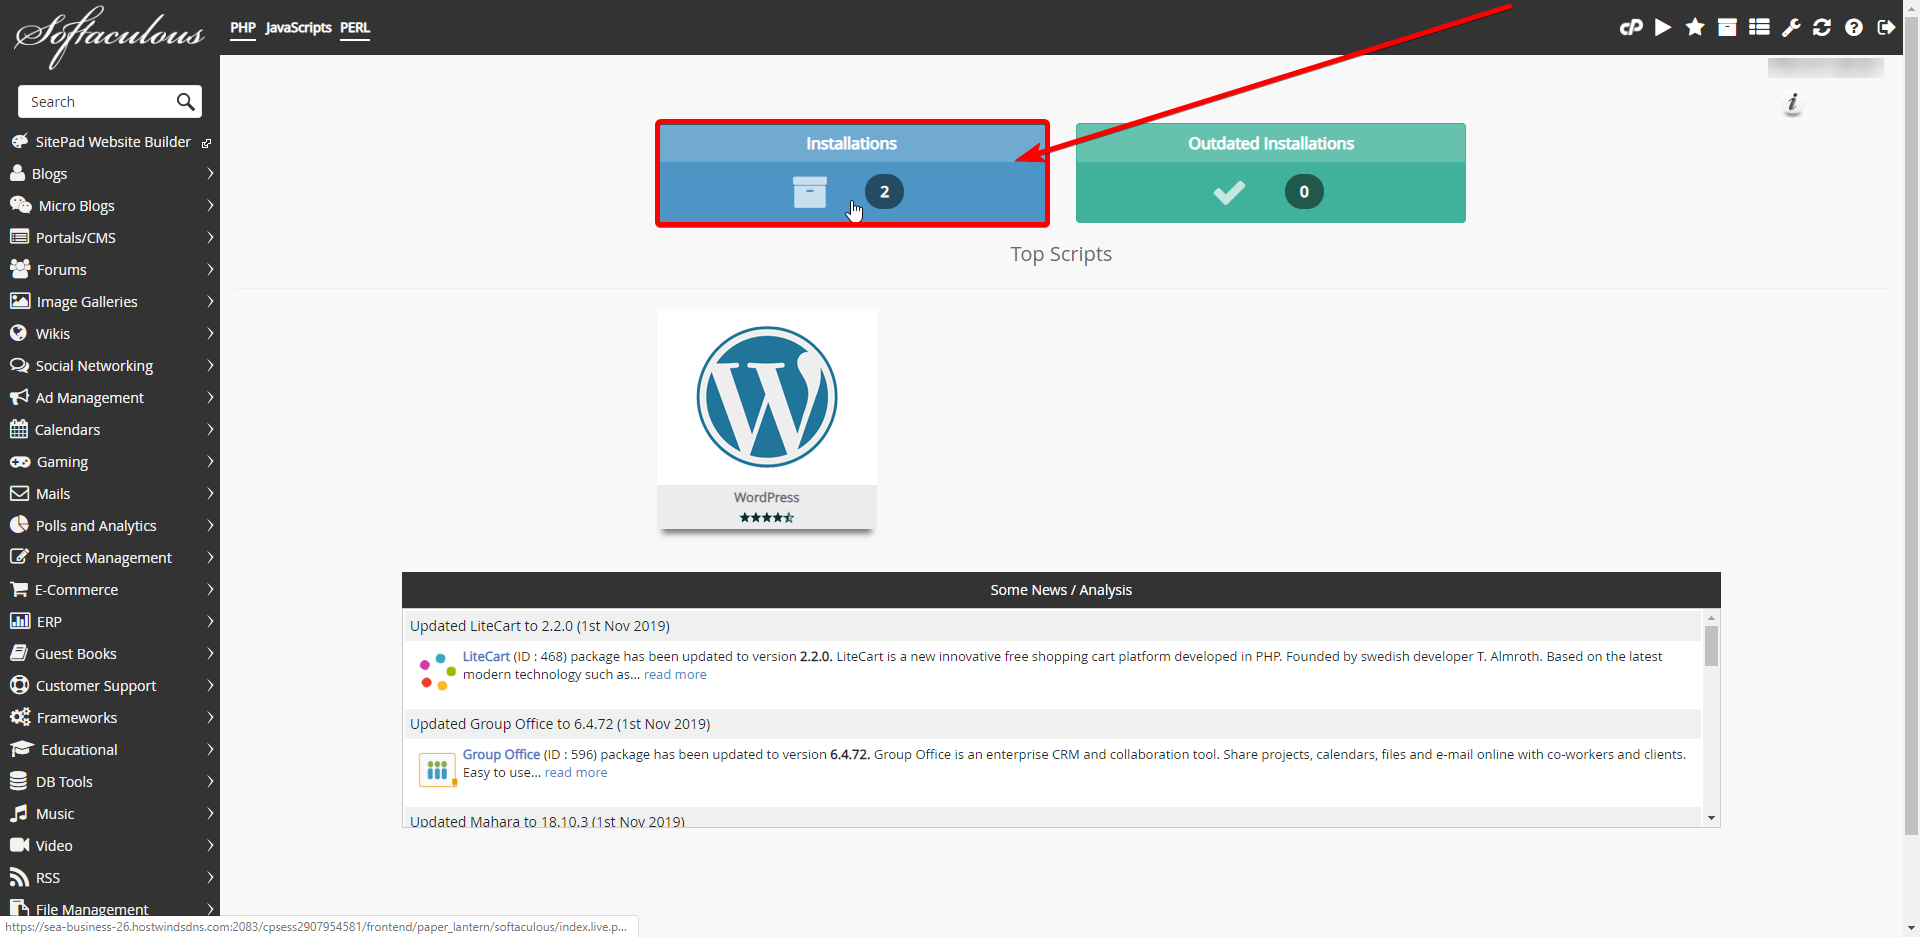
Afterward, select the blue Installations button. This will take you to the available WordPress installations and their corresponding root accounts.
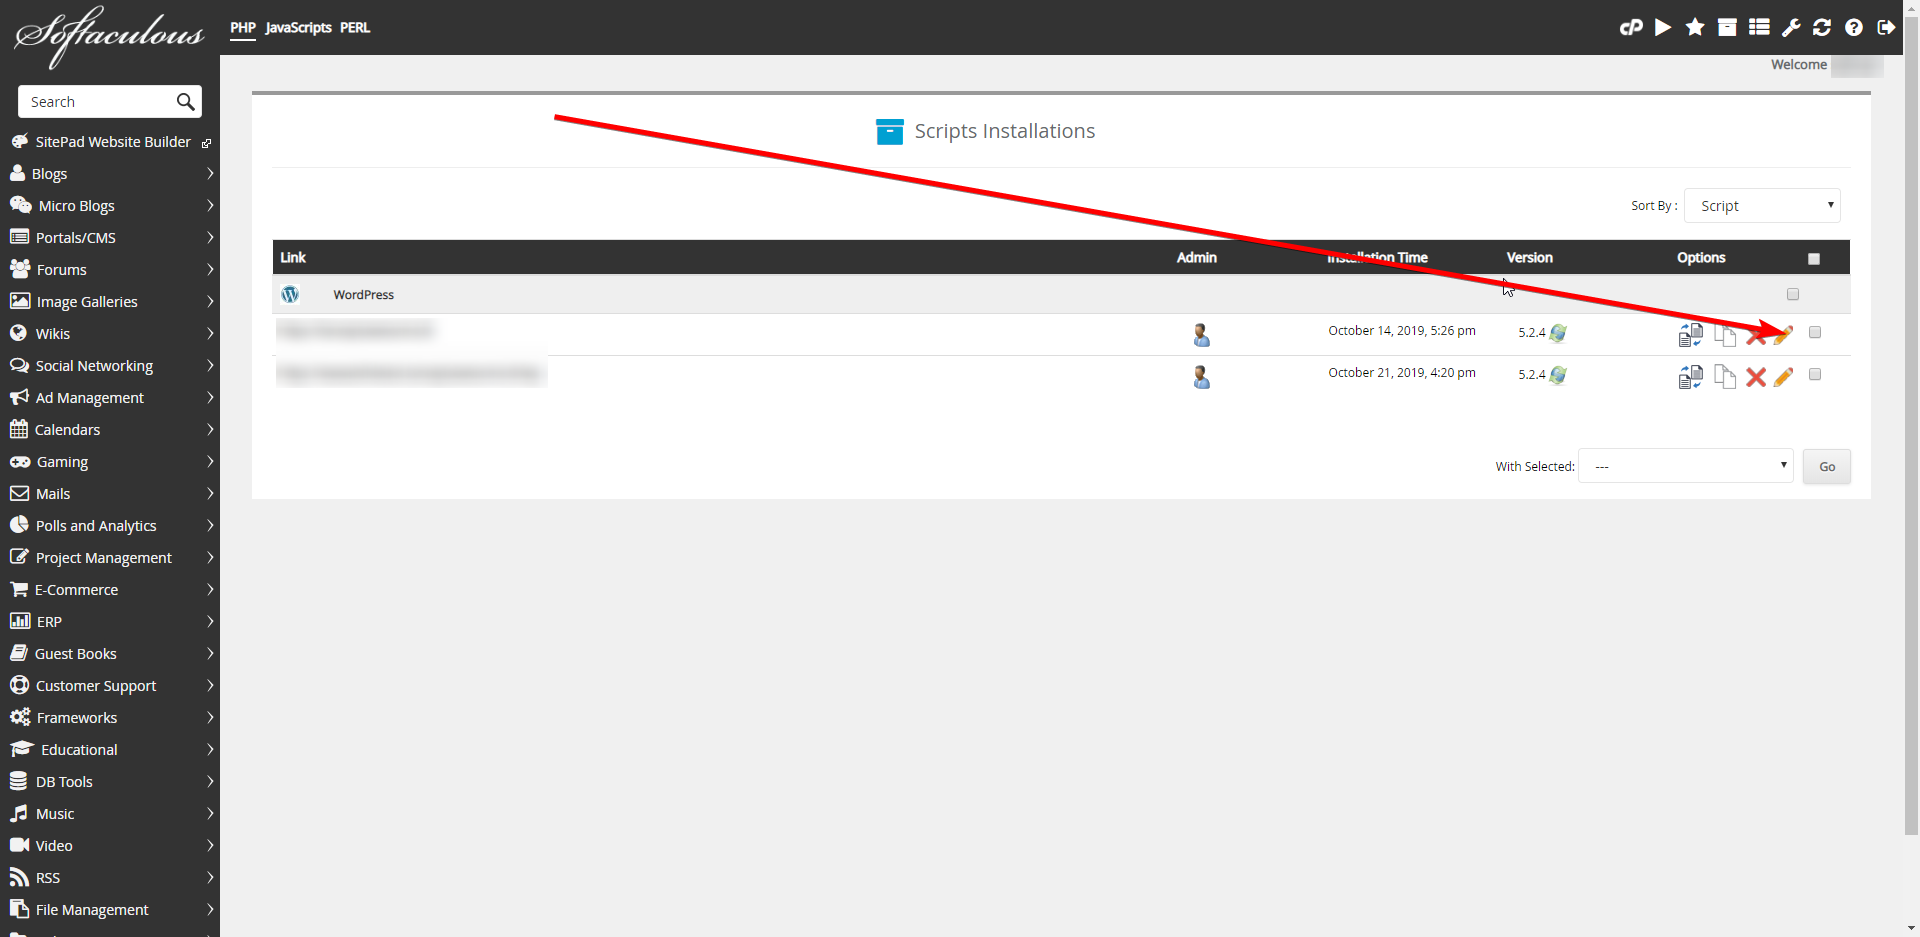
Under the WordPress tab, you're going to select the pencil to the far right of the WordPress installation account you want to edit.
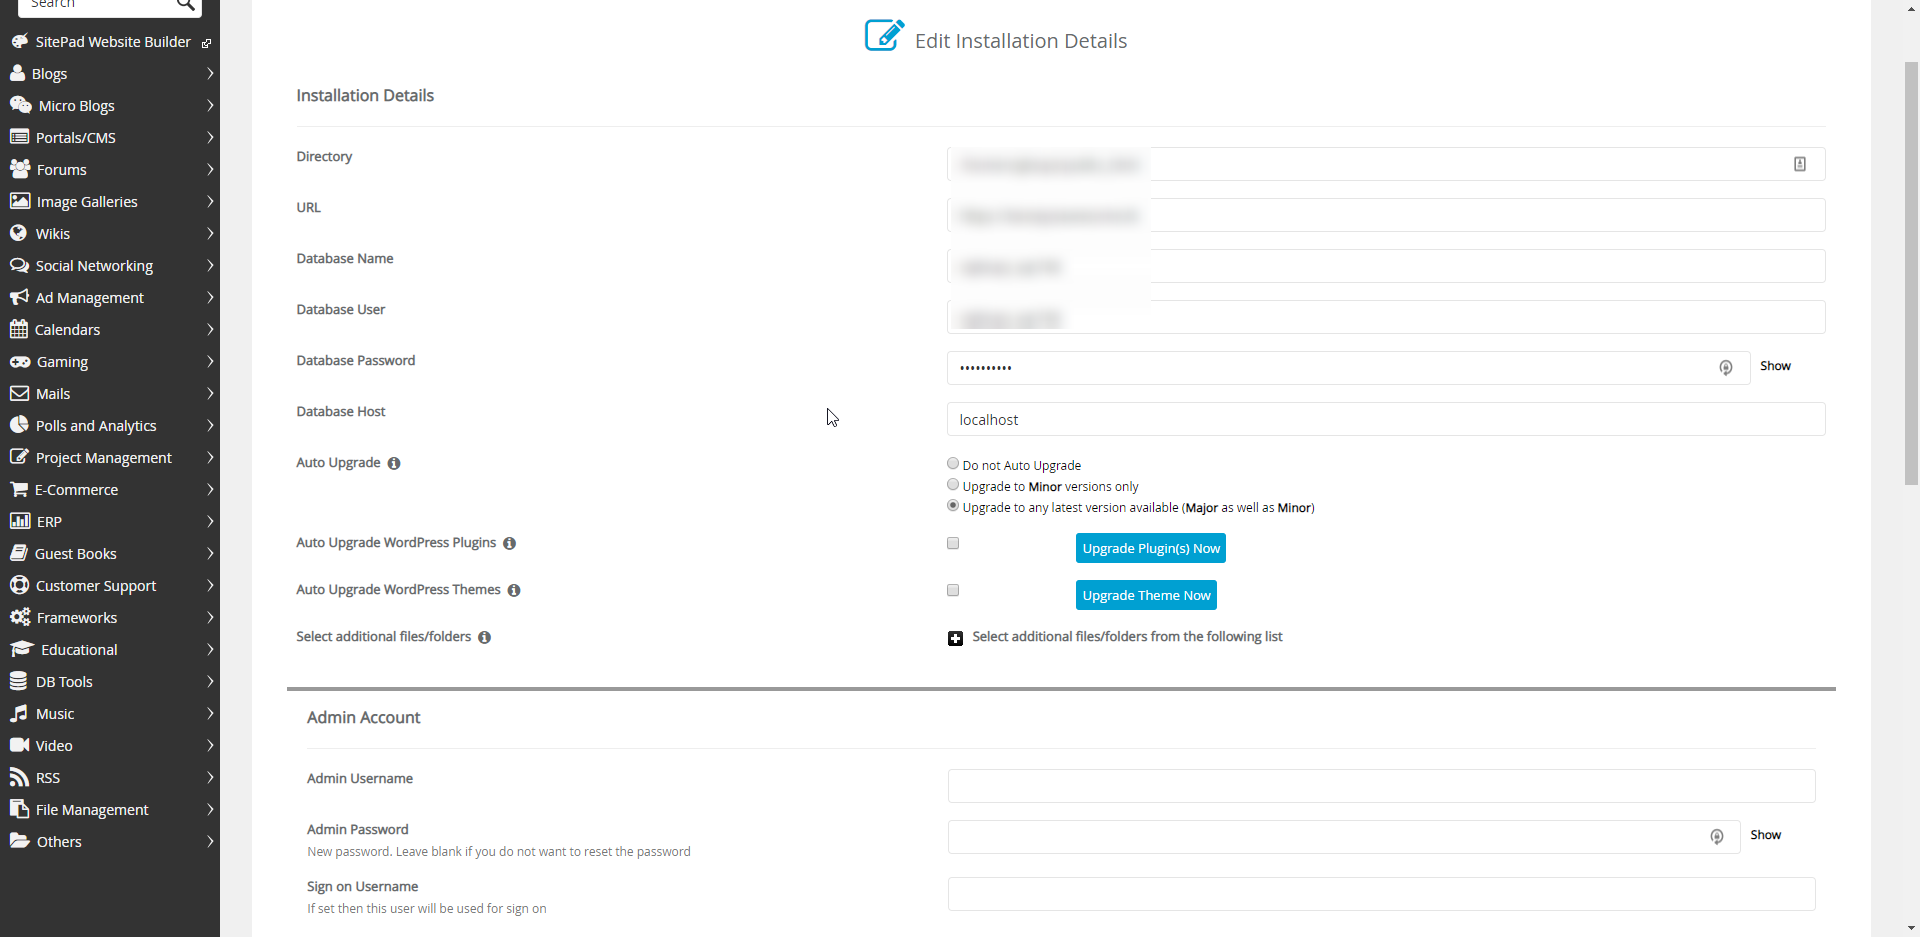
Once you've reached this screen, you now have the option to change everything WordPress-related and more. In the first section, you can change the directory location of your WordPress installation (This won't move the existing files, but new files will be placed in the new destination). The URL of the created WordPress site can be changed and the database name, user, password, and host. Upgrades can be managed for WordPress, plugins, and themes while also providing you with the option to select additional files/folders.
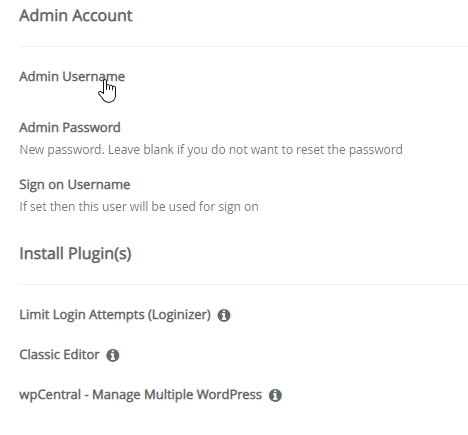
The second section holds all the admin account and plugin(s) information. In the admin subsection, you can change the admin password after entering the username and setting a sign-on username. Within the plugin subsection, you and limit login attempts, enable classic editor and wpCentral, allowing you to manage multiple WordPress sites.
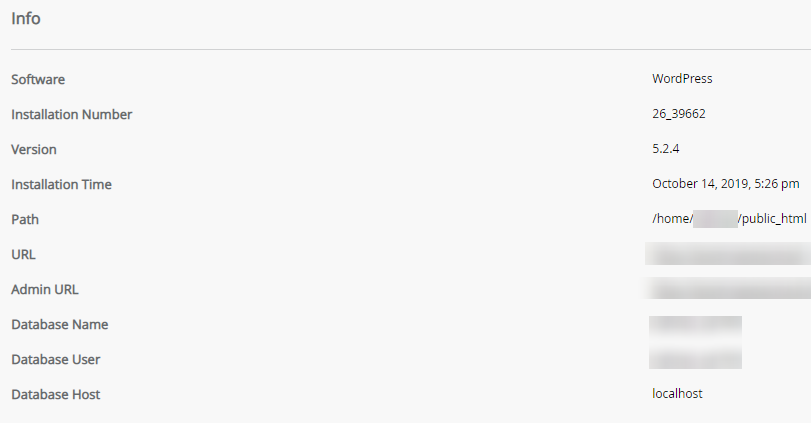
Last but not least, the info section contains all the information about the WordPress installation. This includes most of the aforementioned information mentioned in the first section.
Written by Tanzey Wawa / November 12, 2019
