Hostwinds Tutorials
Search results for:
Table of Contents
How to Export or Backup a Database with PHPMyAdmin
Tags: phpMyAdmin, Backups
This article is about taking a backup of your database. It is intended for clients who have PHPMyAdmin installed on their Hostwinds Shared Hosting, Business Hosting, Cloud, VPS, or Dedicated Server account. Before making any changes to your databases or updating your applications, or making any significant changes, it is important always to take a backup. Hostwinds suggests taking a backup of your database frequently so that you can easily restore your database at any time and in case anything goes wrong.
How To Backup Your Database Using cPanel and PHPMyAdmin
Step One: Login into your cPanel Account
Step Two: Navigate to the Databases section and click phpMyAdmin

Step Three: Click on the database name on the upper left side of the page that you would like to create a backup for
Step Four: Click on Export in the top middle part of the page.

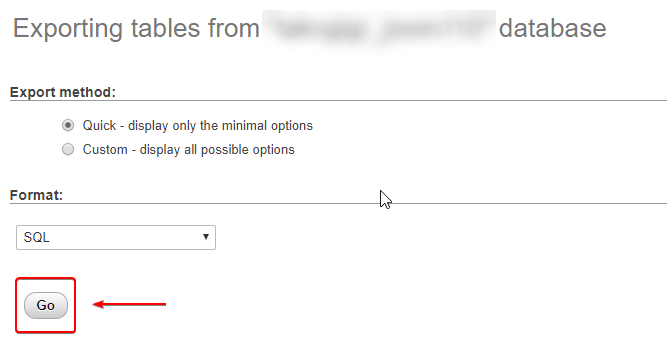
Step Five: Select the Export method you would like to use, the format, and click the Go button.

This will create the backup file and download it to your computer so that you have a backup.
Backup Database Using Cron
Step One: Login to your cPanel Account
Step Two: Scroll down to the Advanced Section > Click on Cron Jobs

Step Three: Scroll down to the Common Settings
Step Four: Select the frequency to create your database backups, or enter this in manually
Step Five: Enter in the Command to run to backup your databases
mysqldump --opt -Q -u [cPanelUserName] -p[cPanelPassword] --all-databases > /home/[cPanelUsername]/[FILE_NAME]_`date +\%d\%m\%y`.sql
Replace the following in the above cron job with your account specific details:
[cPanelUserName] [cPanelPassword] [cPanelUsername] [FILE_NAME]
Step Six: Click the Add New Cron Job button
Step Seven: Once this cron job has been created, you can check and confirm that the file exists in your home directory and that everything is working as expected.
If we can help you in any way, please submit a ticket or join us in a Live Chat anytime. We are available 24/7/365, and we are dedicated to our client's success; every client truly matters to us.
Written by Hostwinds Team / April 6, 2018
