Hostwinds Tutorials
Search results for:
This article will guide you on installing and configuration of your nightly Duplicati backup addon for your Windows Cloud Server or Dedicated server with Hostwinds. After completing this setup, the backup will be scheduled to backup every night, at a time of your choosing, by default. You can choose other scheduling options for your backups, which will be discussed further in the article.
When the Duplicati Nightly Backup service is ordered and created, it will generate a ticket in your client account. This ticket will contain both the download link for the setup program and the link to the configuration file you'll need to complete this setup as shown in the image below:

First, you'll log into the Windows Server via Remote Desktop Protocol and, using the link (highlighted in the image above), download the setup application. While this is downloading, copy the other URL shown in the image and paste that into a new tab in your browser. It will bring you to a page that contains the configuration file for your backup setup in plain text.
With the cursor focused on this page, use CTRL+A to select all and then CTRL+C to copy what you have selected. Open Notepad on your server and then use CTRL+V to paste the configuration information into Notepad. Click File in the top left of the Notepad Window and select save, title the document backups and save it to your desktop as a convenient location as we'll be using this file again shortly.
Next, we'll launch the application we downloaded by clicking it in the browser. If you closed this, the application will be in the default download location for your browser or downloaded a second time. Clicking this will start a typical Windows installation Wizard. Follow through with the wizard with all the default settings, accepting the license terms, and launch Duplicati on completion. This will open a new tab in your browser that points to the link below:
http://localhost:8200/ngax/index.html
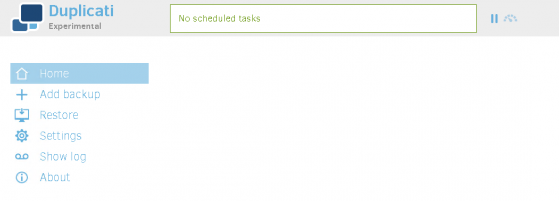
This is the control access page for Duplicati in all Windows servers. There will also have been a desktop icon created by the Wizard, which will be used in the future to reach this page.
The first step we will take here will be clicking Add Backup, which will bring us to the page shown below:
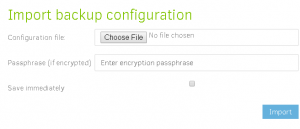
We're going to click on Choose File from this page, which will open a Windows Explorer box. Click on Desktop in the Window's left pane, and you'll see the 'backups' file we created using the configuration information a short while ago. Select this and click Open in the Windows Explorer box. You'll see the field in the above picture change from No File Chosen to backups.conf. Click the Import button, and this will bring us to the next step, General Backup Settings.
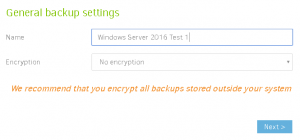
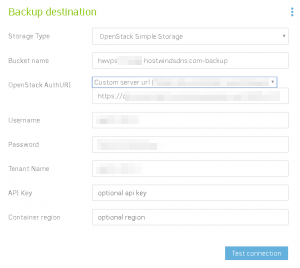
This is where you would give your backup a name. Please do so and then click Next to bring us to the Backup Destination page shown below. There is only one field on this page you will be changing. This is the Open Stack Auth URL field. Using the drop-down menu, select the Custom Server URL, which will be based on the data center location of your server. The image below shows a Dallas setup. After choosing the server to backup to in that drop-down menu, you'll click the Test Connection button. A window should pop up asking if you wish to create a folder with your server's hostname, and you should select yes. Another window will appear stating the connection worked. Click OK and then Next at the bottom of the page.
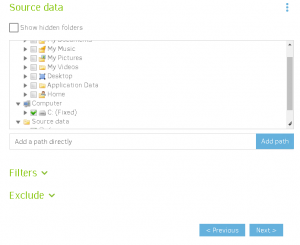
The next page we come to is Source Data. This is where you'll select what will be backed up each time the service runs. You can choose to be as specific or as broad as you desire in this. Meaning, you could choose to only backup your site data and databases by entering those paths, or you can choose to back up the entire server by selecting the C drive, as shown in the image below. Once you have selected the path / data you wish to have backed up, please click Next to move forward to the Schedule page.
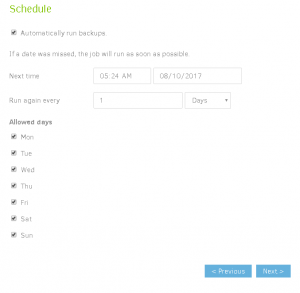
This next page, shown below, gives you the option of selecting exactly what time and days your backups will run. Please note that backup storage is charged based on the amount of data stored, so that these choices will affect your monthly pricing. We recommend taking frequent backups, taking a backup before any major changes, and regularly checking in to ensure your backup is completed without error. After selecting the days and times for your backups, you can click next and move to the last Options screen.
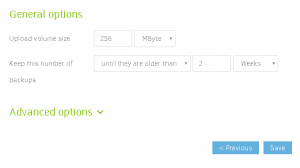
This final page of the setup provides the option of how long to store your backups. The default storage limit is set to two weeks, but you are free to alter that if you wish. The upload volume size should be left as the default. Once you've made your choices, click Save, which will open a Window to start your first backup run. Select Continue Without Encryption, and you'll see the backup start to run in a progress bar at the top of the screen.
If you have any questions about a specific step of this process or require assistance, please contact us via Live Chat or a ticket to support so we can assist you.
Written by Hostwinds Team / August 23, 2017
