Hostwinds Tutorials
Search results for:
Table of Contents
How to Change a Domain Name in Virtualmin
Tags: DNS, Virtualmin
Virtualmin makes it very easy to change the domain name that your Virtual Server uses. This article will cover how to change your domain name using the Change Domain Name module in Virtualmin. To access this module, you'll need to have Virtualmin installed and be logged into your Virtualmin control panel.
How To Change Your Domain Name In Virtualmin
Once you're logged in and ready to proceed, please refer to the following steps to change your domain name.
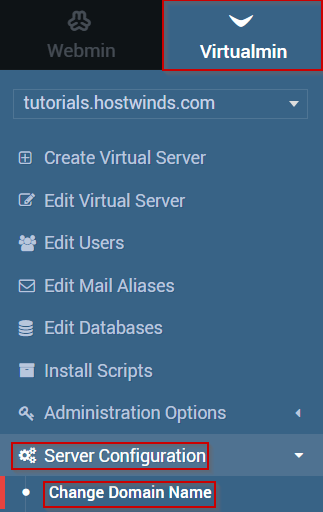
From the two tabs in the sidebar, Select the Virtualmin section
Under that, you will see many options available. Navigate and click on the Server Configuration from the list.
Under the subsection of that, click on Change Domain Name.

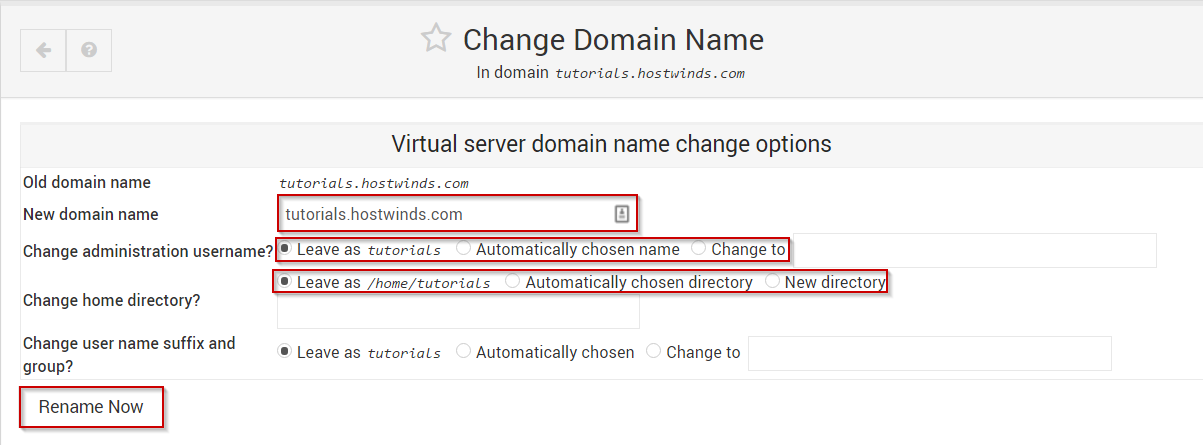
This will bring you to a new page. In the New domain name text box, enter the new domain name.
Decide if you'd like to change the username associated with the domain name. And select the appropriate option in the Change administration username? Option.
Decide if you'd like to change the home directory for the domain and if so, enter in the new directory you want next to the Change home directory? Option.
When you're satisfied, click the Rename Now button.

Once the page reloads, your new domain name will be in place, and once any necessary DNS changes have been made and propagation has been completed, it should be accessible to the outside world.
If you should have any questions or would like assistance, please contact us through Live Chat or by submitting a ticket with our Technical Support team.
Written by Michael Brower / May 2, 2017
