Hostwinds Tutorials
Search results for:
Table of Contents
Cancel an Hourly VPS
Tags: VPS
Once you are ready to cancel an hourly VPS service, there is a way to ensure that it is canceled instantly. You would want to use the destroy option for your server under Actions. The destroy option is an exclusive option to cancel an hourly VPS. It ensures that they can be canceled instantly. This allows you to cancel an hourly VPS immediately.
How to Destroy an Hourly Instance
To cancel an hourly VPS, go to the Cloud Control Portal. Then clicking on Actions > Destroy for your server on the right side of the server that you wish to cancel.

For the Server you wish to cancel, you want to go to Actions > Destroy to cancel an hourly VPS permanently.
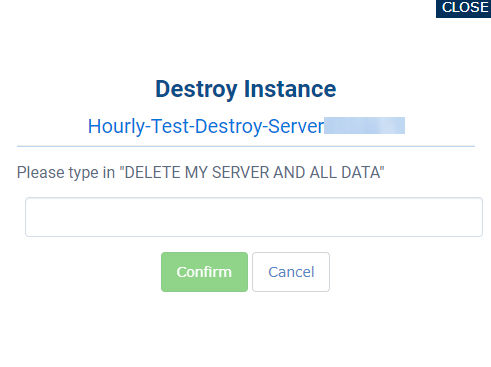
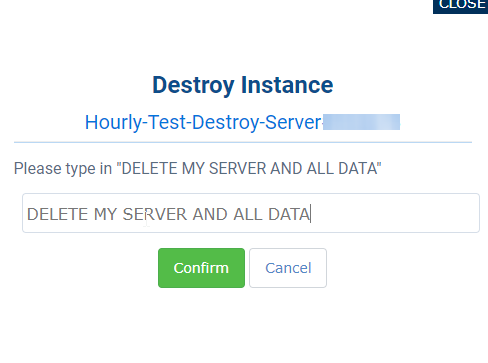
Once you click on Destroy, there will be a popup on the screen that will ask you to enter the text "DELETE MY SERVER AND ALL DATA". You would need to enter in all caps exactly the way it is shown to confirm. This confirms you acknowledge that this will permanently delete all data on the server.
This action is not reversible, so be certain that you wish to Destroy your server and all data on the server before proceeding.

You should get this window to pop up when you click on destroy.
Once you have entered the requested statement, then you would need to click on confirm. This will permanently delete the server.

Enter the requested phrase in all caps as follows 'DELETE MY SERVER AND ALL DATA'
You should then see something similar to the notification below that states the server has been removed. This will tell you that you have canceled an hourly VPS.

You should then see Terminate Processing for the server.
This will confirm that your server is destroyed instantly and does not gather additional time while the cancellation request would be pending.
Why Do I Not Cancel an Hourly Instance like other VPS Services?
You would not want to submit a traditional cancellation request for the server for the following reasons.
- A cancellation request is not confirmed immediately
- The destroy option would be instant
- When you make a cancellation request, some extra steps must be taken to have the service canceled.
- If those steps are not taken, the server will remain active, and the active time will be added to the cost of the hourly server.
- The destroy option is exclusive for your Hourly VPS to ensure that they can be canceled instantly.
Written by Hostwinds Team / June 5, 2021
