Hostwinds Tutorials
Search results for:
Table of Contents
How Can I Automatically Have Dedicated IPs Assigned to cPanel Accounts?
Automatically Creating an Account with a Dedicated IP Using WHM
Tags: WHM
How Can I Automatically Have Dedicated IPs Assigned to cPanel Accounts?
The steps listed below are fitted to explain the process of enabling automatic dedicated IP assignment for new cPanel accounts created through the WHM interface. Before proceeding, it is highly recommended to have the latest WHM / cPanel version to follow these steps on.
How Can I Automatically Have Dedicated IPs Assigned to cPanel Accounts?
To automatically have an IP address assigned during cPanel account creation, you'll need to create a custom package when logged into your WHM.
You'll need to have additional unused IP addresses for this to work.
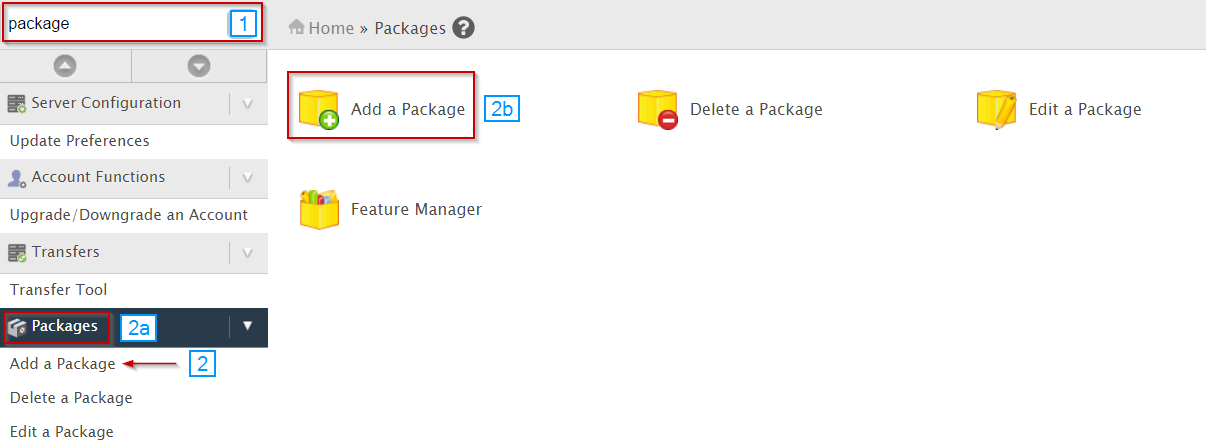
- Using the search box in WHM, type in the word package
- From the matches that populate below the search bar, select Add a Package
- You can also click on Packages
- Select Add a Package

- Set the Package Name to something that will help you identify the package later
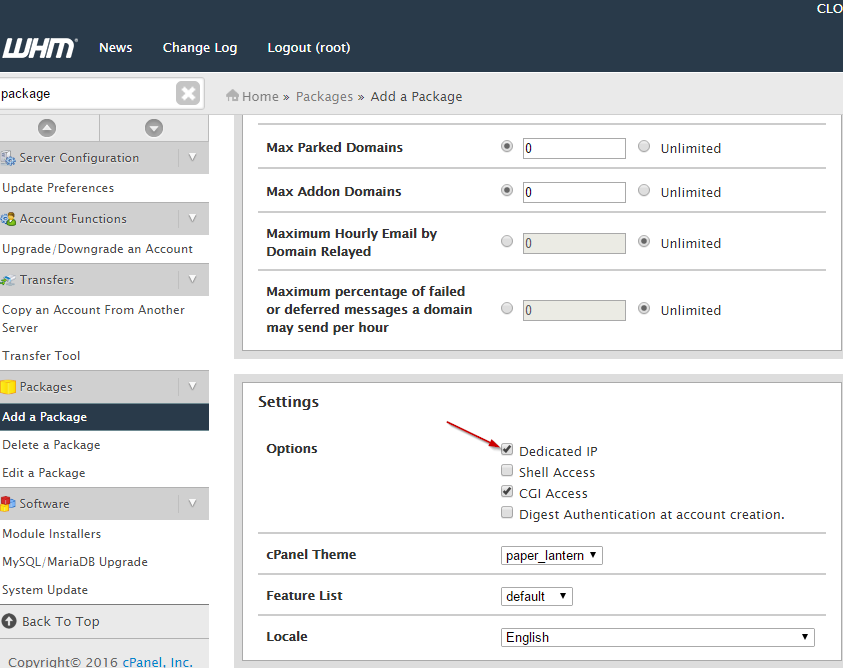
- You can set various options or limits that can be put in place during account creation. However, to assign a dedicated IP, scroll to the bottom and locate the Settings section.
- Click the checkbox next to Dedicated IP.

- Click the Add button at the bottom of the page to save your package.

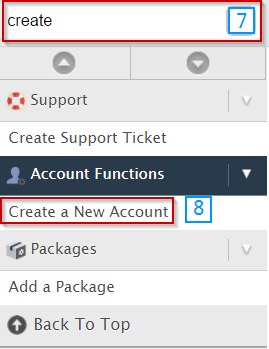
- Again using the search bar in WHM, type in the word create
- From the matches that populate below the search bar, select Create a New Account

- Fill in the necessary information for the cPanel account and scroll down to the Package section.
- In the Package section, select the package that we created earlier from the Choose a Package dropdown list.

- Once you've entered all of the necessary information for the account, click the Create button at the bottom of the page.

If you should have any questions or would like assistance, please contact us through Live Chat or by submitting a ticket with our Technical Support team.
Written by Hostwinds Team / December 13, 2016
