Hostwinds Tutorials
Search results for:
Table of Contents
Apache Web Server Configuration in WHM
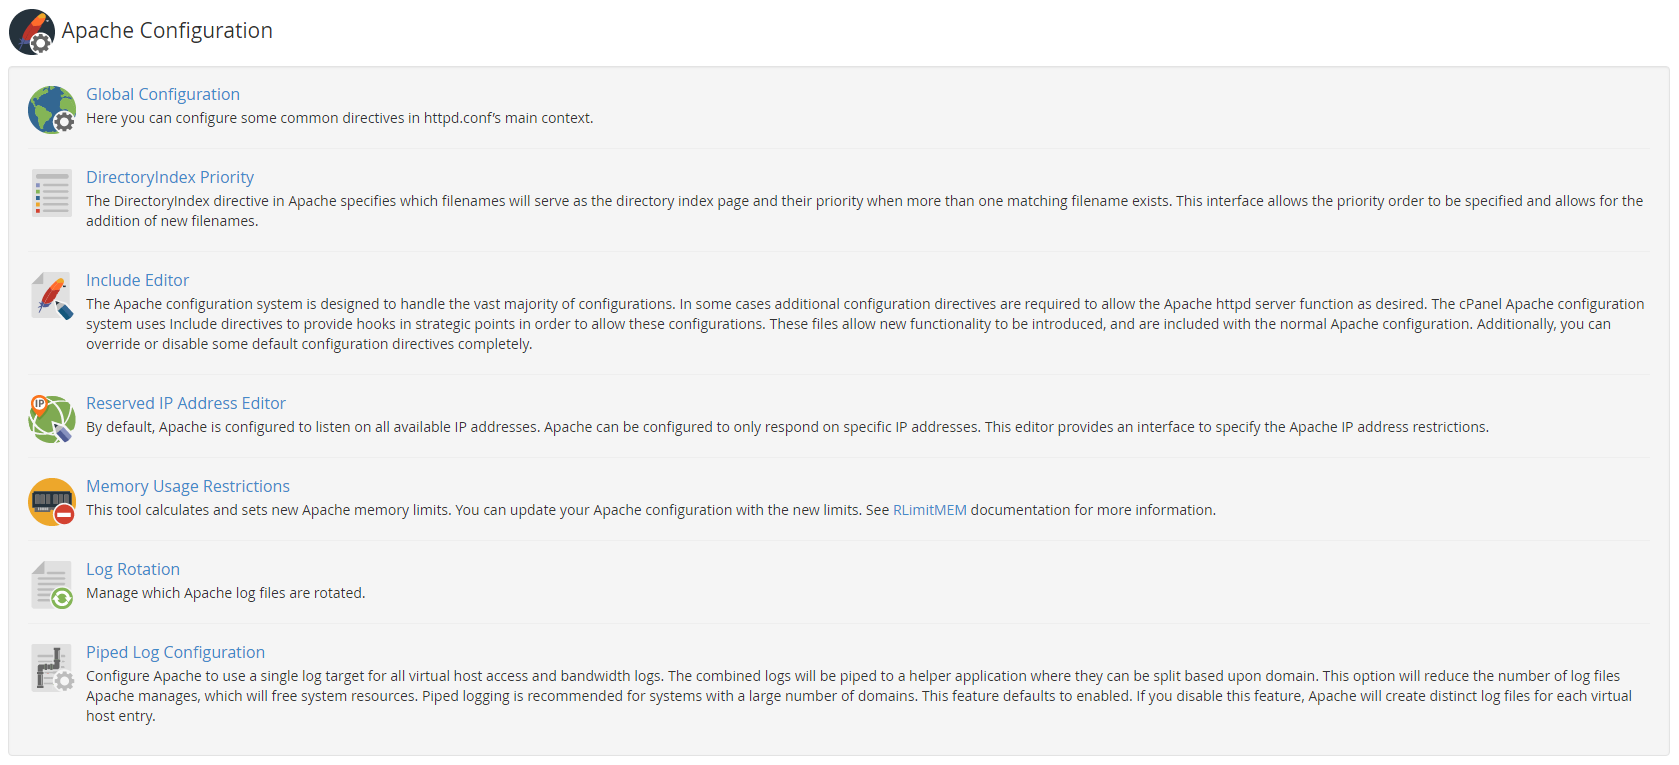
WHM provides you with full control over the Apache/HTTPd webserver service. To manage Apache's configuration, navigate to Service Configuration -> Apache Configuration in the WHM sidebar, and then all configuration options are divided into several sections. Each of these sections, and the options available within them, are detailed below.

Global Configuration
This section gives you many options for configuring httpd—conf's main context.
Any changes made to the Apache Global Configuration do not take effect until the main Apache configuration file is rebuilt.
- SSL Cipher Suite: Specifies what OpenSSL encryption methods are supported in the SSL handshake phase of connections to the server. Values are separated by a colon (":").
- SSL/TLS Protocols: Specifies the SSL protocol specifications supported for the SSL handshake phase of connections to the server.
- LogLevel: Specifies the minimum priority level/type of event to be saved in the Apache log.
- LogFormat (combined): Specifies the long format events are to be saved as in the Apache log.
- LogFormat (common): Specifies the short format events are to be saved as in the Apache log.
- Trace Enable: Specifies the behavior of TRACE requests to both the core server and mod_proxy.
- Server Signature: Specifies the 'signature' the server appends to the end of generated messages (errors, info pages, etc.).
- Server Tokens: Specifies the level of information provided in a "Server" response header to clients.
- File ETag: Specifies the file attributes used to create the ETag response's header when the request is file-based.
- Directory "/" Options: Specifies whether specific features of Apache are enabled or disabled.
- Start Servers: Specifies the number of child processes created on server startup.
- Minimum Spare Servers: Specifies the desired minimum number of child processes for the server.
- Maximum Spare Servers: Specifies the desired maximum number of child processes for the server.
- Server Limit: Specifies the value for MaxClients for the lifetime of the Apache process.
- Max Request Workers: Specifies the maximum number of simultaneous requests to be served.
- Max Connections Per Child: Specifies the maximum number of requests supported by a single server child process.
- Keep-Alive: Enabled persistent HTTP connections.
- Keep-Alive Timeout: Specifies the amount of time to wait for subsequent requests on a persistent connection.
- Max Keep-Alive Requests: Specifies the number of requests allowed on a persistent connection.
- Timeout: Specifies the amount of time the server waits for events before a request fails.
- Symlink Protection: Enables symlink protection.
DirectoryIndex Priority
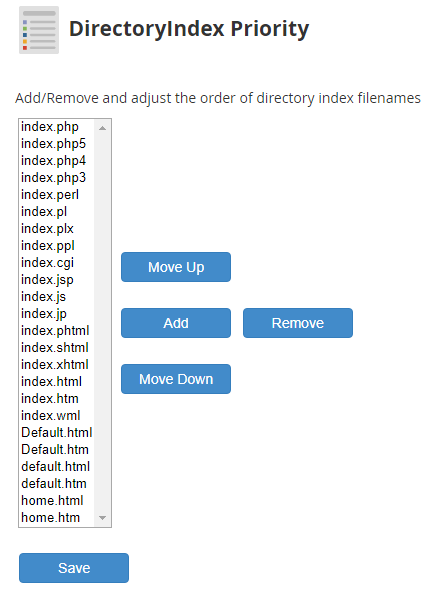
This section lets you specify what filenames will serve as index pages and the priority between them when more than one matching filename exists.

Add a New Indexing Filename
Add a new indexing filename, click the Add button, enter your new indexing filename (including the file extension) into the popup textbox, and click OK. The new indexing filename will be added to the bottom of the priority list.
Remove an Indexing Filename
To remove an existing indexing filename, select the indexing filename you want to remove in the priority list, click the Remove button, and then click OK on the confirmation popup.
Changing the Indexing Priority
To change the priority of which indexing filename gets chosen over another when both exist, select the filename you want to adjust the priority of in the list of Indexing filenames and select either Move Up or Move Down. The higher on the list, the higher the indexing priority for that filename will be.
Include Editor
To allow additional configurations beyond what is available in the base configuration, the cPanel Apache configuration system uses Include directives to provide hooks to allow these configurations. These files allow additional functionality as they are included with the normal Apache configuration. These can also be used to override or disable default configuration directives.
The included editor allows you to specify directives to be injected to specific points in the Apache configuration file (httpd. conf):
- Pre Main Include: At the top of the Apache configuration file, before the main configuration section.
- Pre VirtualHost Include: Directly before the first VirtualHost entry in the Apache configuration file.
- Post VirtualHost Include: Directly after the last VirtualHost entry in the Apache configuration file.
You can specify if your directives should apply to a specific Apache version or all versions for each of these sections. Select the version number, or All Versions, from the drop-down menu.
Making a selection in that drop down will make a textbox appear that will allow you to enter your Apache directives. Enter your directives in this textbox and select Update.
Reserved IPs Editor
By default, Apache responds to requests on all available IP addresses but can be configured to respond only on specific addresses. The Reserved IPs Editor lets you specify address restrictions.
This page will list all IPs currently assigned and set up in the system. You can check the Reserved IP next to the IP address, click Save, and then click Rebuild Configuration and Restart Apache to specify an IP address as an IP reserved for Apache to respond on.
Memory Usage Restrictions
This module calculates and lets you set Apache memory limits.
This page lets you enable or disable the RLimitMEM limiter. When enabled, you can specify a memory limit in MB. To apply the settings, click Save with the Restart Apache? Checkbox checked.
Log Rotation
This section lets you manage what Apache log files are rotated for archiving based on their size. On this page, you can click the checkbox next to each log file to include them in the rotation, then click Save. These files are rotated based on their size when they reach either the default of 300MB or the size specified in the Log Rotation Size Threshold setting and are then archived to /etc/apache2/logs/archive/.
Piped Log Configuration
This section lets you configure Apache to use a single log file target for all virtual host access and bandwidth logs. Combined logs are piped to another application where they can be split domain by domain. This helps reduce the number of log files Apache has to manage, freeing system resources. To enable Piped Apache Logs, check the Enable Piped Apache Logs checkbox and click Save.
Written by Hostwinds Team / December 7, 2018
