Hostwinds Tutorials
Search results for:
Table of Contents
How to Add New IP Addresses to a Windows Server
Tags: Cloud Servers, Windows
There comes a time for most Windows servers that you need to add IPs to your server. Following this simple guide will show you how to add your new IP address to your Windows VPS 2008, 2012, and 2016. The easiest way to add the IPs to your server is through the Network and Sharing Center.
Add IPs to Your Network through Network and Sharing Center
To add IPs to your network for Windows servers, you need to go to the IPv4 settings to add them to the network. Once it is added there, the server will update immediately with the new IP addresses.
Warning: Once you add the new IP address, the server will automatically update the new IP address. This may momentarily disconnect you from the server, but you should reconnect automatically.
Network Adapter Settings
To Add IPs to your Network, you would need to go to the Network Adapter Settings and add all new IP addresses there. This would require you to add them all one by one to your server. If you have many IP addresses to add, you can also add them using the Command Prompt of your server, which would be much faster, but require more technical knowledge.
Step 1: Open Network and Sharing Center.
You would want to open up the Network and Sharing Center, which can be accessed several ways. The easiest for me is through the network options in the bottom right corner. This works for both Windows Server 2016, as well as 2012. For Windows Server 2008, you would need to go to the Control Panel then select it from there.

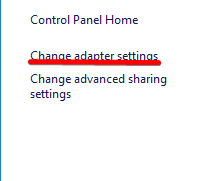
Step 2: Change Adapter Settings
Next, click over on the right to Change Adapter Settings. It should be at the top.
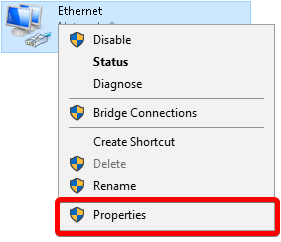
Step 3: Go to Properties
Next Right Click on the network you wish to change. You should only have one Ethernet connection and go to properties.
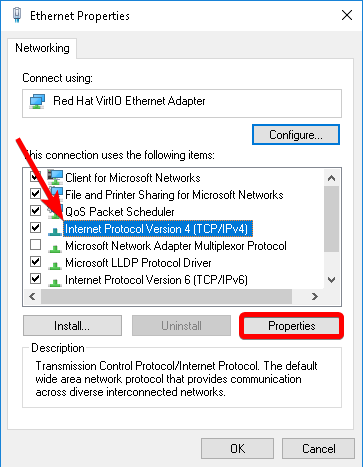
Step 4: Select IPv4, then go to Properties.
Select the Internet Protocol Version 4 (TCP/IPv4) option, then go to the Properties button shown below.
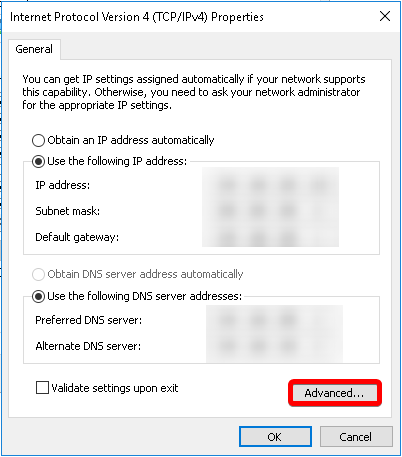
Step 5: Then go to Advanced
Then you would want to go to the Advanced Settings option.
Step 6: Add the IP Addresses to your server
Now you will need to add your IP address to the server.
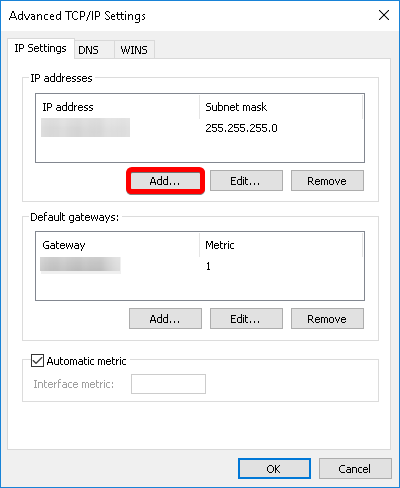
Add the IPs to your network for the server here. You would want to set the Subnet Mask to 255.255.255.0 as well for each IP address.
Notice: Once you are finished, make sure to click the Okay button on the windows to confirm the new IP addresses. Otherwise, it will not save them.
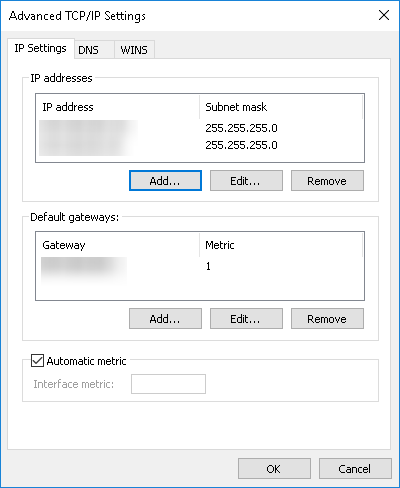
Once you add the new IP address, the server will automatically update for the new IP address. This may momentarily disconnect you from the server, but you should reconnect automatically.
Related Articles
- How To Manage Your Server(s) IPs Using Your Cloud Portal
Written by Hostwinds Team / June 27, 2019
