Hostwinds Tutorials
Search results for:
Creating a database within Vesta Control Panel is very simple and only requires a couple of steps to do this task. Let's go through these steps now.
Step 1: Log into Vesta at YourServerIP:8083 on your server.
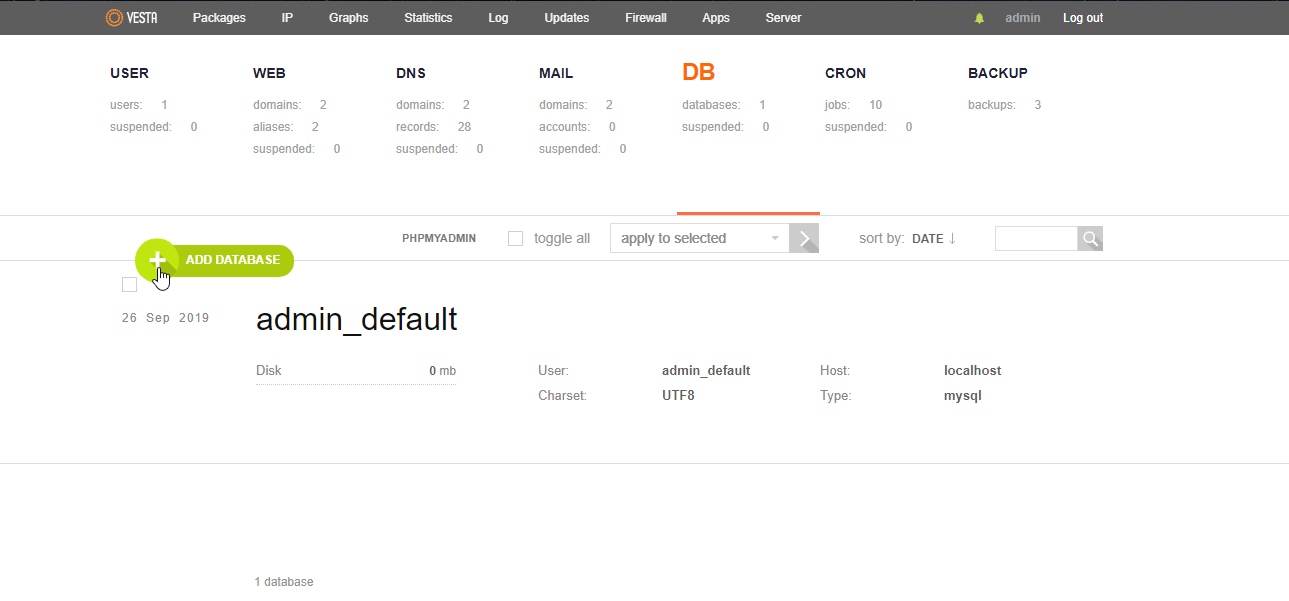
Step 2: Find the database section in your header and click on the "DB."

Step 3: Click the green plus (+) symbol to add a database.

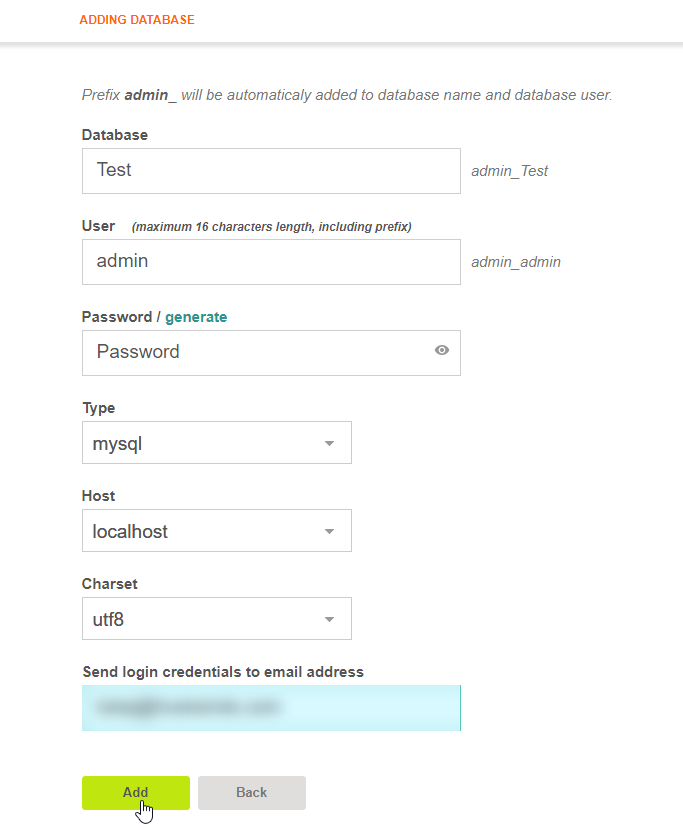
Step 4: Fill in the details as desired. All details can be modified to your preference. When all details are correct, click "Add."

Once you have added it correctly, you should see it in your Database List, and you should see this confirmation message.

Just like that, you have created your very own MySQL database inside Vesta Control Panel.

Written by Luke Johnston / November 1, 2019
