Hostwinds Tutorials
Search results for:
Table of Contents
Installing Wordpress using Softaculous
Tags: WordPress, Softaculous
What Is WordPress?
WordPress is one of the most popular CMSs (Content Management System) available today. It is also available as a free, automatic installation for our Shared, Business, and Reseller hosting clients! Listed below is a step-by-step guide for logging into cPanel from your Hostwinds Client Area and installing WordPress via the Softaculous Apps Installer.
How Do I Install WordPress with Softaculous?
Step One: Login to your cPanel account.
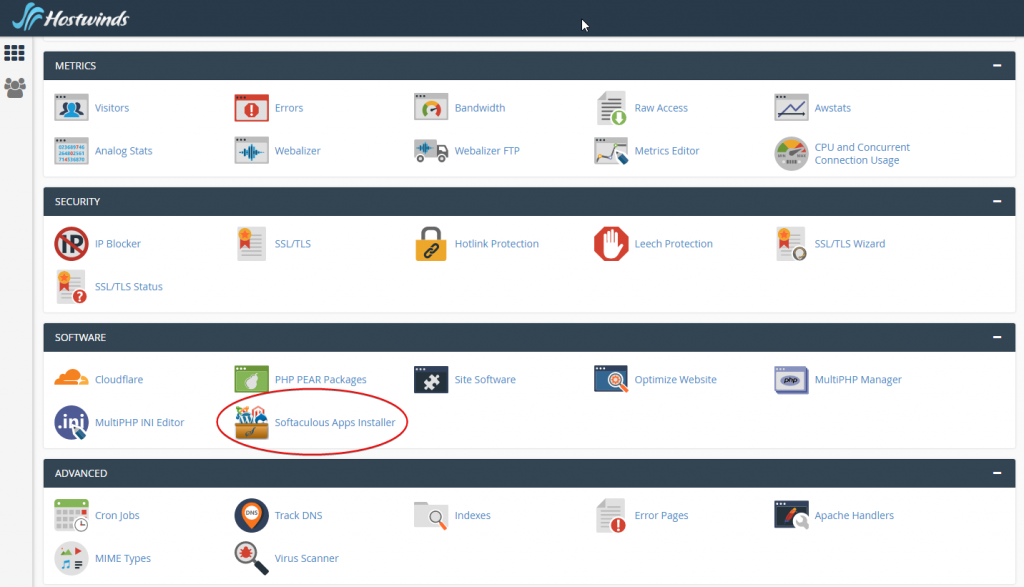
Step Three: Once cPanel has loaded, scroll down to the "Software" section and click "Softaculous Apps Installer"
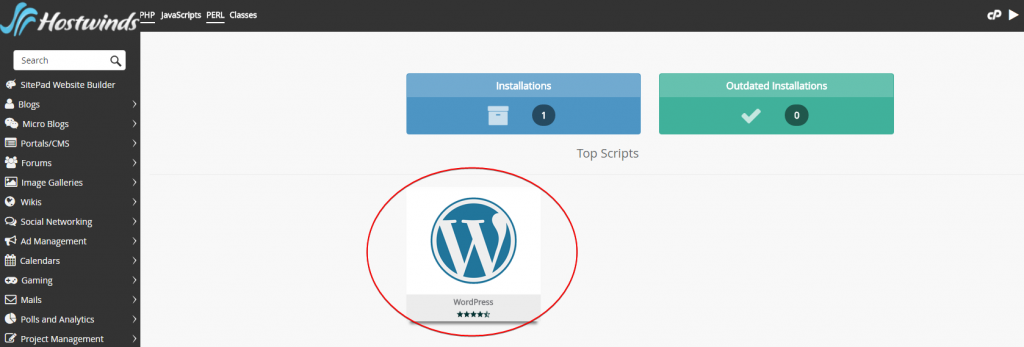
Step Four: On the next page, under Top Scripts, click WordPress.
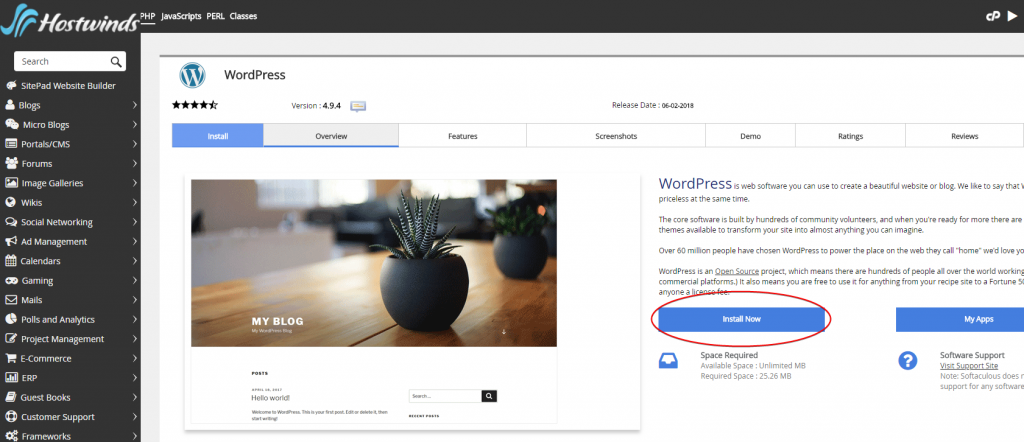
Step Five: On the next page, click "Install Now"
Step Six: Next, you will need to fill out the required fields to ensure your installation goes exactly as you want. Once all fields are filled out, click the "Install" button.
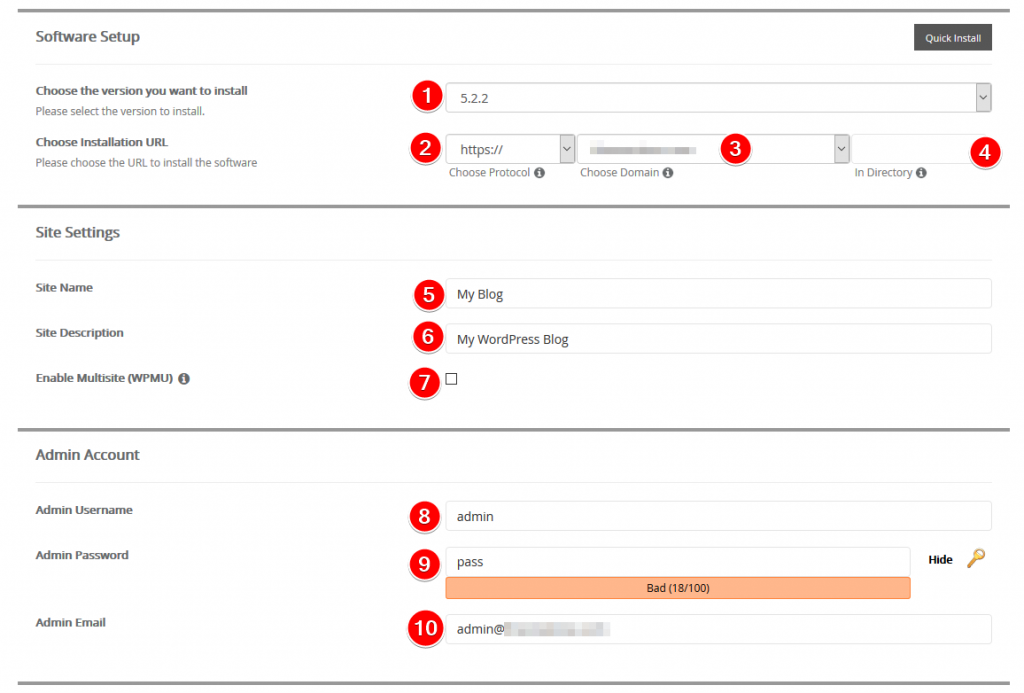
- Choose the WordPress version you would like to install. It is recommended to use the latest version, as this will have the most recent security patches.
- Choose the protocol using http:// or https://. If you select https:// and see an error, this is likely due to your recently added domain on the cPanel account. AutoSSL will update the certificate within 24 hours for any Shared or Business Hosting account with Hostwinds once the domain is pointed to your account.
- Select the correct domain name from the drop-down menu
- Enter the directory, such as blog, or just set it to blank/empty. Leaving this blank will install and overwrite any files in the document root of the specified domain. By default, this box contains "wp," so WordPress will be reachable by visiting yourdomain.com/wp.
- Enter the Site Name that will appear at the top of a browser when visiting your website
- Enter your Site Description if you would like to have a subtitle under your Site Name
- Enable Multisite if you would like to utilize this feature.
- Enter the admin username other than admin
- Enter the admin password for your user by generating a strong password
- Enter the admin email address for notifications and alerts
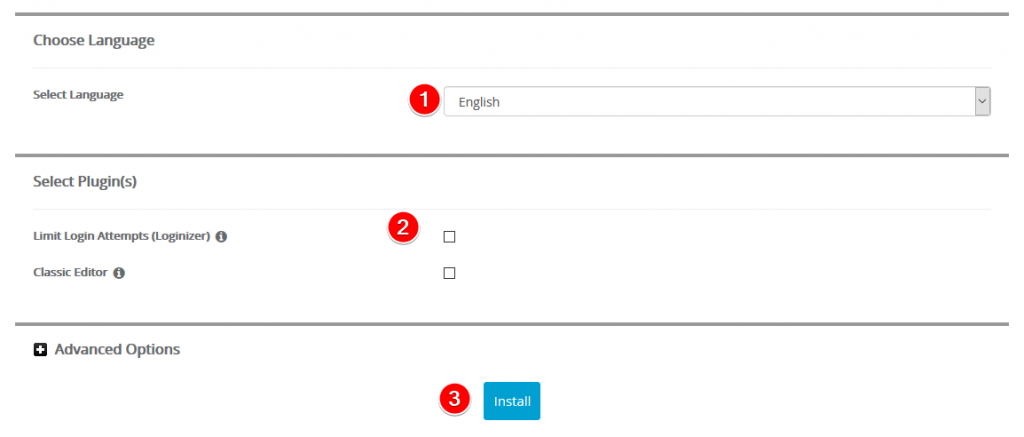
- Select your preferred language
- Select your desired plugins to have installed.
- Limit Login Attempts - This plugin can be used to help prevent Brute force attacks by limiting login attempts.
- Classic Editor - This plugin reimplements the Classic WordPress editor for versions greater than 5 (otherwise, the Gutenberg editor will be used. - Click the install button to complete the installation!
The installation process will be shown on the screen. Once completed, you will be shown a summary, including a link to your newly installed WordPress site, as well as a link to your new WordPress dashboard log-in screen.

Your new WordPress installation will now be live, and you will be able to log in to your WordPress Dashboard!
Important Notes:
Leave the directory empty if you want yourdomain.com to use WordPress. If you only want WordPress on a certain directory, put that here. For example /blog - WordPress will be installed in yourdomain.com/blog. If you want to use a directory like this, make sure the directory does not already exist.
Leave the database name that it assigns unless you're comfortable with databases and have already set one up that you want to use
Don't use admin for your username to log in for security reasons
Generate a strong admin password and store this in a safe place
Enable the installation of the Limit Login Attempts plugin
By default, your installation of WordPress will upgrade automatically
You may also choose to auto upgrade themes and features, although this is not enabled by default in the Advanced Options area
Written by Hostwinds Team / June 5, 2021
